

")

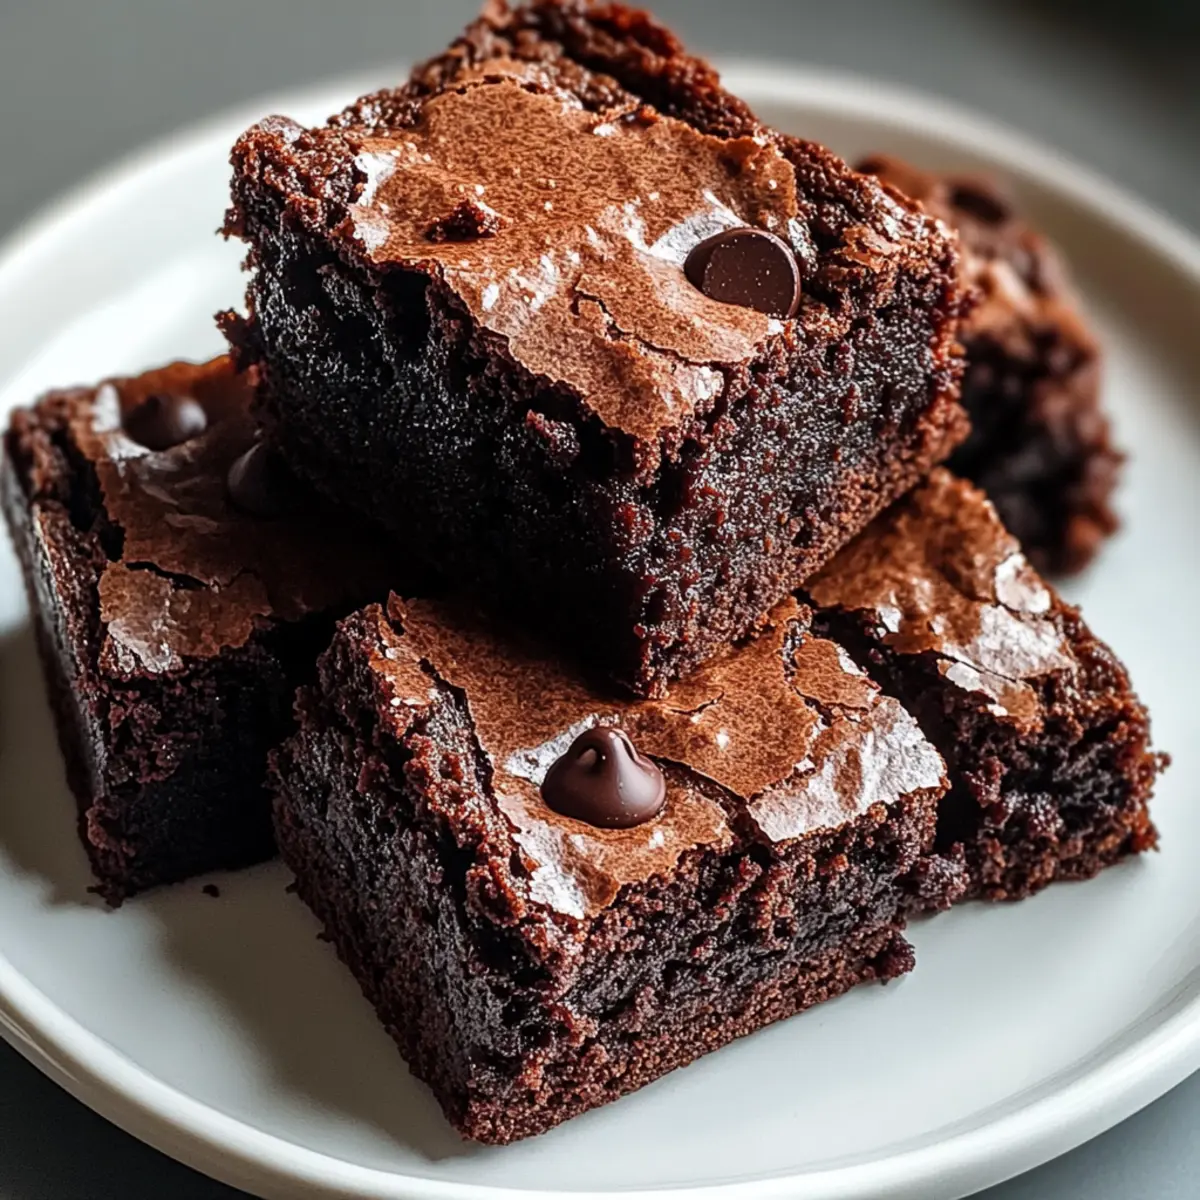
As I was rummaging through my pantry, searching for a cure to a persistent sweet craving, I found myself daydreaming about fudgy brownies—rich, chocolatey, and utterly irresistible. That’s when the idea struck me: why not whip up a batch of gluten-free chocolate brownies? With just a handful of ingredients and less than an hour to spare, this easy dessert satisfies even the most demanding of chocolate lovers. Not only do these decadent gluten-free chocolate brownies boast a melt-in-your-mouth texture, but they’re also perfect for impressing guests or simply treating yourself after a long day. Curious about how to bring your brownie dreams to life? Let’s dive in!
Why Are These Brownies a Must-Try?
Decadent flavors: These gluten-free chocolate brownies explode with rich, chocolatey goodness that keeps you coming back for more.
Quick and easy: Whip them up in under an hour, making them perfect for spontaneous dessert cravings.
Crowd-pleasing appeal: Whether you’re hosting a gathering or just treating yourself, these brownies are guaranteed to impress.
Versatile options: Customize your batch with nuts or swap chocolate types to suit your preferences. Want to know more about enhancing your dessert repertoire? Check out our guide on easy dessert recipes.
Guilt-free indulgence: Satisfy your sweet tooth without compromising dietary needs—no gluten, all bliss!
Gluten-Free Chocolate Brownie Ingredients
- For the Batter
- Unsalted Butter – Creates a creamy base that enhances the chocolate flavor; swap for coconut oil to make it dairy-free.
- Granulated Sugar – Provides necessary sweetness and adds to the beautiful crinkly top texture.
- Pure Vanilla Extract – Boosts the richness and depth of flavor for an irresistible taste.
- Eggs – Bind the ingredients together and offer moisture; whisking them fluffy helps achieve a lighter consistency.
- Gluten-Free All-Purpose Flour – Replaces traditional flour, ensuring you maintain that delightful brownie texture without gluten; choose a reliable blend for best results.
- Unsweetened Cocoa Powder – Adds concentrated chocolate flavor and gives your brownies that deep cocoa color.
- Baking Powder – Provides essential lift while keeping the center delectably fudgy.
- Salt – Balances the sweetness and intensifies the chocolate flavor for a perfect harmony.
- Semi-Sweet Chocolate Chips or Chunks – Melt and create pockets of gooey chocolate within each brownie, enhancing the indulgence.
- Chopped Nuts (Optional) – Offers a delightful crunch and a nutty flavor contrast; feel free to add your favorites for extra texture!
This list of ingredients lays the foundation for your memorable gluten-free chocolate brownies that promise to be a hit with everyone, whether they’re gluten-sensitive or simply craving an amazing treat.
Step‑by‑Step Instructions for Decadent Gluten-Free Chocolate Brownies
Step 1: Preheat and Prepare
Preheat your oven to 350°F (175°C). While it warms, line an 8×8 inch baking dish with parchment paper, letting the edges overhang for easy removal later. This setup ensures that your gluten-free chocolate brownies bake evenly and can be easily lifted out once they’re done.

Step 2: Melt Ingredients
In a microwave-safe bowl, combine unsalted butter and half of the chocolate chips. Heat them in 20-second intervals, stirring in between, until everything is smooth and glossy. This melted mixture brings richness to your brownie batter, so make sure it’s well combined before moving on to the next step.
Step 3: Whisk Wet Ingredients
In a large mixing bowl, whisk together granulated sugar, pure vanilla extract, and eggs until the mixture is light and fluffy, about 2-3 minutes. This process introduces air, resulting in a lovely texture for your decadent gluten-free chocolate brownies. The fluffiness will help create a perfect lift as they bake.
Step 4: Combine Chocolate and Eggs
Once your melted chocolate mixture has cooled slightly, mix it into the whisked egg-sugar combination until fully incorporated. The glossy chocolate folds into the batter beautifully, ensuring that each bite of your brownies is packed with luscious flavor and melt-in-your-mouth goodness.
Step 5: Add Dry Ingredients
Sift gluten-free all-purpose flour, unsweetened cocoa powder, baking powder, and a pinch of salt directly into the wet mixture. Gently fold the dry ingredients with a spatula just until no flour streaks remain. It’s important to handle the batter lightly to maintain the dense, fudgy texture of your gluten-free chocolate brownies.
Step 6: Fold in Chocolate Chips and Nuts
After combining the dry and wet ingredients, fold in the remaining chocolate chips and any optional chopped nuts. This addition creates delightful pockets of gooey chocolate and a pleasant crunch in your brownies, making them even more irresistible.

Step 7: Spread and Bake
Carefully spread the brownie batter evenly in the prepared baking dish, smoothing the top with a spatula. Bake in the preheated oven for 25-30 minutes. The brownies are done when a toothpick inserted into the center comes out with a few moist crumbs attached, ensuring fudgy perfection.
Step 8: Cool and Serve
Once baked, remove the brownies from the oven and let them cool in the pan for about 10 minutes. Carefully use the parchment overhang to lift them out onto a wire rack, allowing them to cool completely. After cooling, slice the brownies into squares and prepare for a decadent treat that everyone will love!
Make Ahead Options
These Decadent Gluten-Free Chocolate Brownies are perfect for busy home cooks looking to save time on dessert prep! You can prepare the brownie batter and keep it in the refrigerator for up to 24 hours before baking. Simply mix all your ingredients until combined, then cover the bowl tightly with plastic wrap or transfer the batter to an airtight container to prevent drying out. When you’re ready to enjoy, just pour the chilled batter into your prepared baking dish and bake as directed. Alternatively, you can bake the brownies ahead of time and store them in an airtight container at room temperature for up to 3 days; this way, they remain just as fudgy and delicious, ready to satisfy any sweet tooth at a moment’s notice.
Expert Tips for Gluten-Free Chocolate Brownies
- Smooth Chocolate: Ensure melted chocolate is completely smooth before mixing it with the batter. This helps achieve a luxurious texture in your gluten-free chocolate brownies.
- Avoid Overmixing: Be careful not to overmix once you add the dry ingredients; stop as soon as there are no flour streaks left. Overmixing can lead to cakey brownies instead of fudgy ones.
- Check for doneness: Use a toothpick to check for doneness, aiming for a few moist crumbs clinging to it. Overbaking will result in dry brownies, so keep a close eye on the timer!
- Choose Quality Flour: Invest in a high-quality gluten-free all-purpose flour blend. Not all flours yield the same result, and a good one ensures deliciously consistent brownies.
- Add Flavor Twists: Experiment with adding a pinch of espresso powder or sea salt on top before baking to enhance the chocolate flavor in your brownies.
What to Serve with Decadent Gluten-Free Chocolate Brownies
Imagine indulging in rich, fudgy chocolate brownies while complementing them with delightful sides that elevate your dessert experience.
- Vanilla Ice Cream: The cold creaminess of vanilla ice cream beautifully contrasts the warm, fudgy brownies, making each bite a heavenly delight.
- Fresh Berries: Tart raspberries or sweet strawberries add a burst of freshness, balancing the rich chocolate and enhancing the overall flavor profile.
- Whipped Cream: Light and airy whipped cream brings a delightful texture, creating a luscious finish that pairs perfectly with every chocolatey bite.
- Espresso: A cup of rich espresso offers a perfect pairing; the robust flavor intensifies the chocolate, while the warmth enriches the overall enjoyment.
- Caramel Sauce: Drizzled on top or served on the side, caramel adds a sweet, buttery note that complements the brownies’ chocolaty depth.
- Nuts or Chocolates: For an added crunch, serve with toasted nuts or chocolate bites on the side, enhancing texture and elevating the indulgence of the brownies.
- Mint Tea: A warm cup of soothing mint tea refreshes the palate after the rich dessert, creating a delightful balance.
- Chocolate Drizzle: Elevate your brownies by drizzling with melted chocolate or bittersweet ganache for an extra layer of decadence.
- Cheesecake Bites: Creamy cheesecake bites offer a rich contrast, creating a delightful variety of textures and flavors that chocolate lovers adore.
Gluten-Free Chocolate Brownies Variations
Feel free to explore these delightful twists, making your gluten-free chocolate brownies uniquely yours!
-
Dark Chocolate: Swap semi-sweet chocolate for dark chocolate to deepen the flavor profile; a luscious choice for chocolate lovers.
-
Nutty Flour: Use almond flour instead of gluten-free flour for a nutty flavor and slightly grainy texture; this adds richness to your brownies.
-
Espresso Boost: Add a pinch of espresso powder to the batter for an intense chocolate experience; the subtle coffee undertone enhances the richness.
-
Coconut Delight: Incorporate shredded coconut into the batter for a tropical twist; the coconut adds delightful flavor and texture contrast.
-
Chili Heat: For those who love a kick, sprinkle a dash of cayenne pepper into the batter; it creates an intriguing sweet and spicy surprise!
-
Vegan Version: Replace eggs with flaxseed meal or chia seeds mixed with water; this simple swap ensures everyone can enjoy these basic brownie essentials.
-
Sweetener Swap: Use maple syrup or honey for a natural sweetener instead of granulated sugar; this gives a hint of caramel flavor, ideal for a healthier touch.
-
Chocolate Drizzle: Drizzle melted chocolate or caramel over the cooled brownies for an elegant touch; this simple garnish elevates them for special occasions.
For additional inspiration in your baking adventures, be sure to check out our guide on easy dessert recipes and make your sweet creations truly remarkable!
How to Store and Freeze Gluten-Free Chocolate Brownies
Airtight Container: Store brownies in an airtight container at room temperature for up to 3 days to maintain their fudgy texture and flavor.
Refrigeration: To extend freshness, refrigerate brownies for up to a week. Be sure to use parchment paper to separate layers if stacking.
Freezer: For longer storage, individually wrap brownies in plastic wrap, then place them in an airtight freezer bag. They can be frozen for up to 3 months without losing their decadent taste.
Reheating: When ready to enjoy, simply thaw at room temperature or warm in the microwave for about 10-15 seconds for a delightful melt-in-your-mouth experience!
Decadent Gluten-Free Chocolate Brownies Recipe FAQs
How do I choose ripe ingredients for these brownies?
Absolutely! For the best flavor, always select high-quality ingredients. Use fresh eggs, premium cocoa powder, and unsalted butter that is pure and creamy. If you’re opting for optional chopped nuts, choose ones that are firm and not too old to avoid any bitterness.
What is the best way to store leftover brownies?
Very! Keep your gluten-free chocolate brownies in an airtight container at room temperature for up to 3 days. If you wish to keep them longer, refrigerate them for up to a week, ensuring layers are separated by parchment paper to prevent sticking.
Can I freeze these brownies, and how?
Absolutely! To freeze them, first let the brownies cool completely after baking. Then, individually wrap each brownie in plastic wrap, and place them in an airtight freezer bag. They can be frozen for up to 3 months. When you’re ready to enjoy, simply thaw them at room temperature or pop them in the microwave for a quick warm-up—about 10-15 seconds works wonders!
What if my brownies turn out dry or cakey?
Oh no! If your brownies are dry or cakey, it may be due to overbaking or overmixing. Make sure to check them with a toothpick around the 25-minute mark; a few moist crumbs should cling to it when they’re perfectly baked. As for mixing, once you add the dry ingredients, fold gently until just combined to maintain that fudgy texture.
Are these brownies safe for those with allergies or dietary restrictions?
Yes! These brownies are gluten-free, making them suitable for those with gluten sensitivities. If you’re catering to other dietary needs, you can easily replace unsalted butter with coconut oil for a dairy-free option or use flaxseed meal as an egg substitute for a vegan version. Just ensure all substitute ingredients meet the specific allergy requirements!
Decadent Gluten-Free Chocolate Brownies for Blissful Bites
Equipment
- 8x8 inch baking dish
- mixing bowls
- spatula
- Whisk
- Microwave-safe bowl
Ingredients
For the Batter
- 1 cup Unsalted Butter Swap for coconut oil to make it dairy-free.
- 1 cup Granulated Sugar Provides necessary sweetness.
- 2 teaspoons Pure Vanilla Extract Boosts richness and depth of flavor.
- 2 large Eggs Whisk until fluffy for lighter consistency.
- 1 cup Gluten-Free All-Purpose Flour Use a reliable blend for best results.
- 1/2 cup Unsweetened Cocoa Powder Adds concentrated chocolate flavor.
- 1 teaspoon Baking Powder Provides essential lift.
- 1/2 teaspoon Salt Balances sweetness.
- 1 cup Semi-Sweet Chocolate Chips or Chunks Enhances indulgence.
- 1/2 cup Chopped Nuts (Optional) Adds delightful crunch.
Instructions
Step-by-Step Instructions
- Preheat your oven to 350°F (175°C) and line an 8x8 inch baking dish with parchment paper.
- In a microwave-safe bowl, combine unsalted butter and half of the chocolate chips. Heat in 20-second intervals, stirring until smooth.
- In a large bowl, whisk together granulated sugar, pure vanilla extract, and eggs until light and fluffy (about 2-3 minutes).
- Mix the melted chocolate mixture into the egg-sugar combination until fully incorporated.
- Sift gluten-free flour, cocoa powder, baking powder, and salt into the wet mixture, folding gently to combine.
- Fold in remaining chocolate chips and optional nuts.
- Spread the batter evenly in the dish and bake for 25-30 minutes, checking for doneness with a toothpick.
- Let cool for about 10 minutes in the pan before lifting out and slicing into squares.