

")

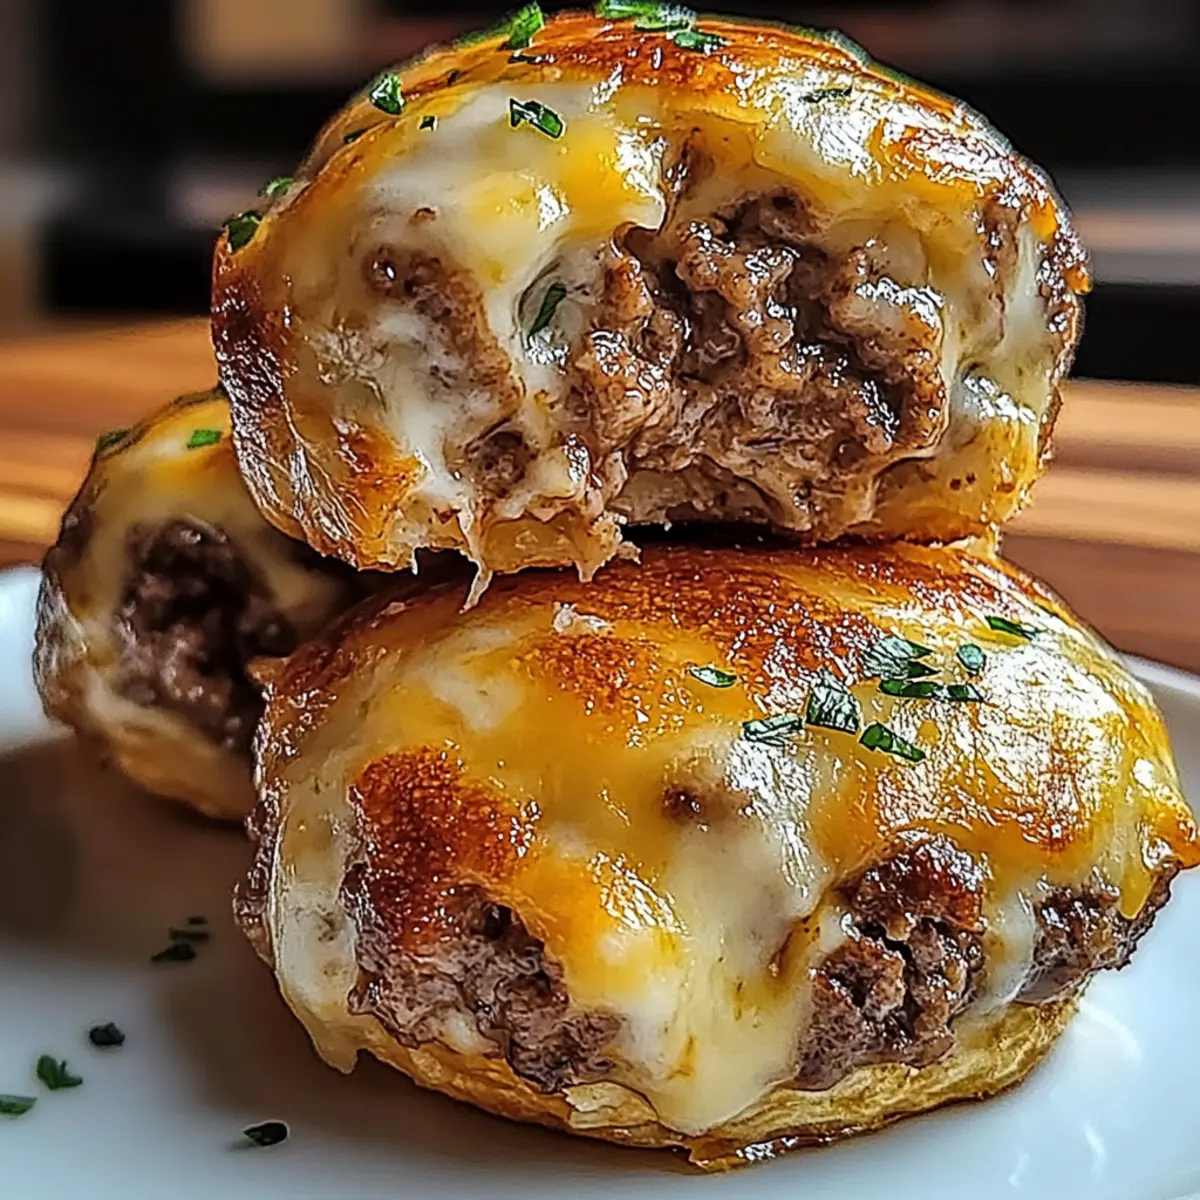
As the oven timer ticks down, the enticing aroma of garlic and savory beef fills my kitchen, transporting me back to lazy afternoons spent crafting comfort food. These Garlic Parmesan Cheeseburger Bombs bring together the irresistible flavors of a juicy cheeseburger in a warm, flaky shell, making them the ultimate crowd-pleaser for any gathering or cozy night in. This easy recipe is not only fun to assemble, but it also promises to satisfy those comfort food cravings without the need for takeout. Plus, they’re freezer-friendly, allowing you to whip them out whenever you need a tasty treat! Ready to learn how to make these mouthwatering bites that will have everyone coming back for seconds? Let’s dive in!
Why are Garlic Parmesan Cheeseburger Bombs irresistible?
Irresistible Flavor: The blend of garlic and Parmesan cheese melds beautifully with seasoned beef, making each bite an explosion of comfort and taste.
Easy to Make: This quick recipe requires just a few steps and minimal skill, making it perfect for first-time chefs and busy home cooks alike.
Crowd-Pleasing Appeal: These handheld delights are ideal for parties, game days, or cozy dinners, ensuring everyone gets their fix of deliciousness.

Versatile Options: Feel free to customize your bombs with different cheeses or add-ins like veggies and spices to cater to various tastes.
Make Ahead: With the option to store leftovers or prep ahead, these bombs are not just great for today but perfect for last-minute cravings tomorrow!
Dive into this recipe and you’ll see why Garlic Parmesan Cheeseburger Bombs are destined to become a favorite in your kitchen. Don’t forget to check out our tips for freezer-friendly meals for even more convenience!
Garlic Parmesan Cheeseburger Bombs Ingredients
For the Filling
• Ground Beef – Provides the main protein and hearty texture; feel free to substitute with ground turkey or chicken for a lighter option.
• Garlic – Adds aromatic depth that is simply irresistible; fresh minced garlic is preferred for the best flavor.
• Parmesan Cheese – Contributes rich, savory notes to each bite; swap with mozzarella for a melty twist.
• Seasoning (salt, pepper, etc.) – Enhances overall flavor; adjust amounts to suit your taste preferences.
For the Dough
• Biscuit Dough – Forms the golden, flaky outer layer; ensure it’s of good quality to hold everything together. Substitutes like crescent rolls or homemade pizza dough work well, but you may need to adjust cooking times.

Once you gather these ingredients, you’ll be well on your way to crafting your very own Garlic Parmesan Cheeseburger Bombs that everyone will adore!
Step‑by‑Step Instructions for Garlic Parmesan Cheeseburger Bombs
Step 1: Prep the Beef Mixture
In a medium mixing bowl, combine the ground beef, minced garlic, and your choice of seasonings such as salt and pepper. Use your hands or a fork to mix thoroughly until all ingredients are well incorporated. This step usually takes about 3-5 minutes. The goal is to create a flavorful filling that will pack a punch inside your Garlic Parmesan Cheeseburger Bombs.
Step 2: Prepare Biscuit Dough
Preheat your oven to 375°F (190°C). Roll out the biscuit dough on a clean surface, ensuring it’s about 1/4-inch thick. Use a pizza cutter or knife to cut the dough into squares or rounds—about 4 inches in size is ideal. These pieces will form the cozy shells for your cheeseburger bombs, so keep them uniform to ensure even cooking.
Step 3: Fill and Shape
Place a generous spoonful of the beef mixture at the center of each piece of dough. Carefully fold the dough over the filling, pinching the edges together to seal securely. Ensure there are no gaps for the filling to escape while baking. Take your time with this step; a proper seal is crucial to create delightful Garlic Parmesan Cheeseburger Bombs that hold their shape!
Step 4: Bake
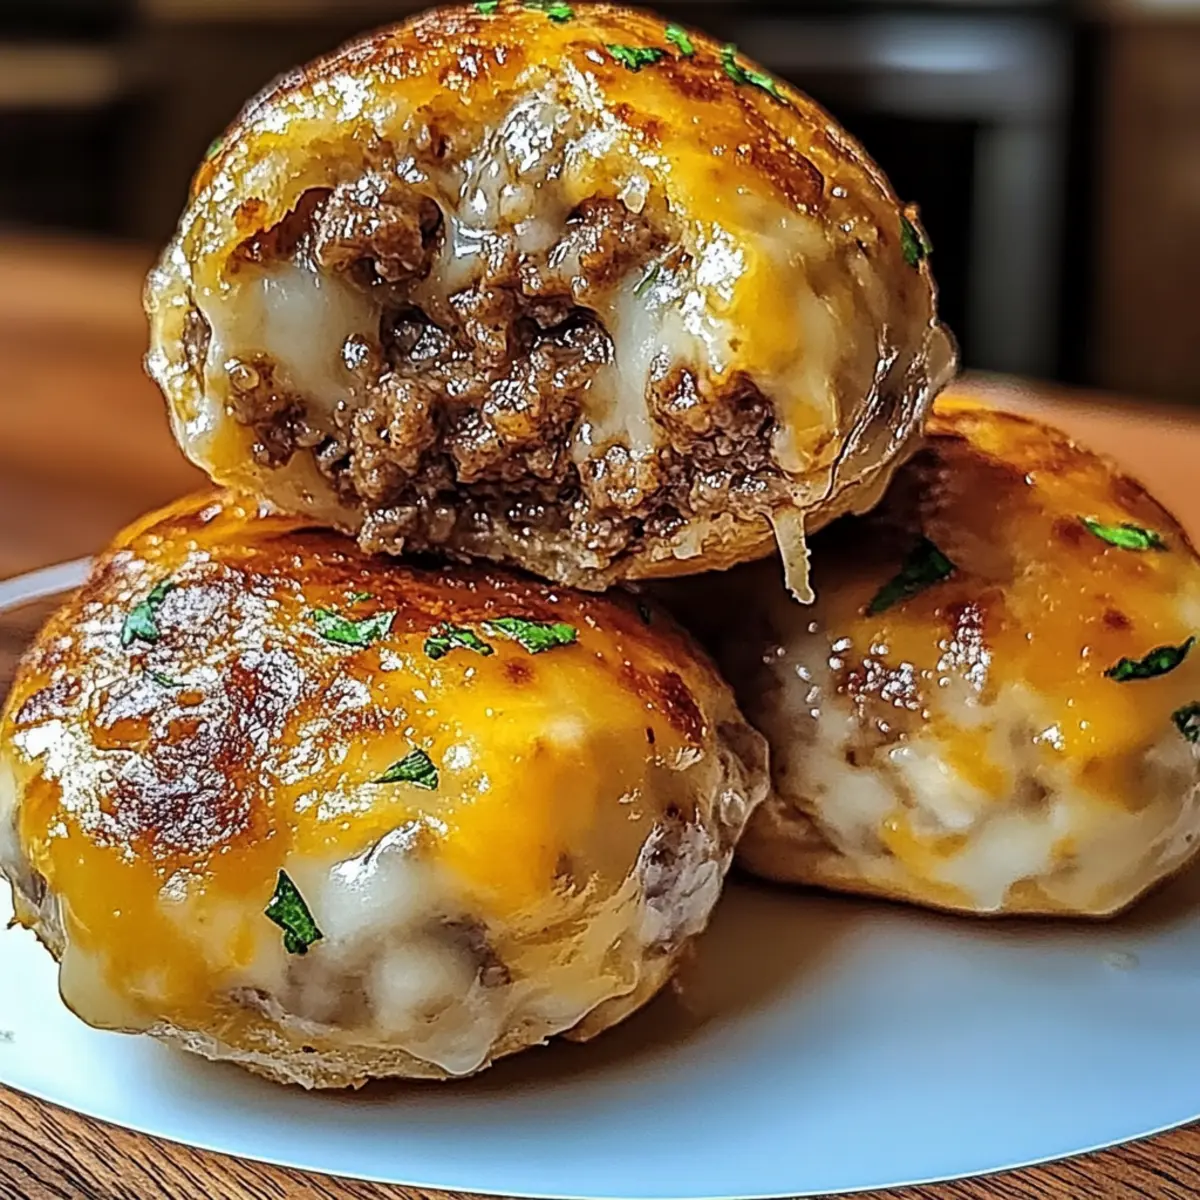
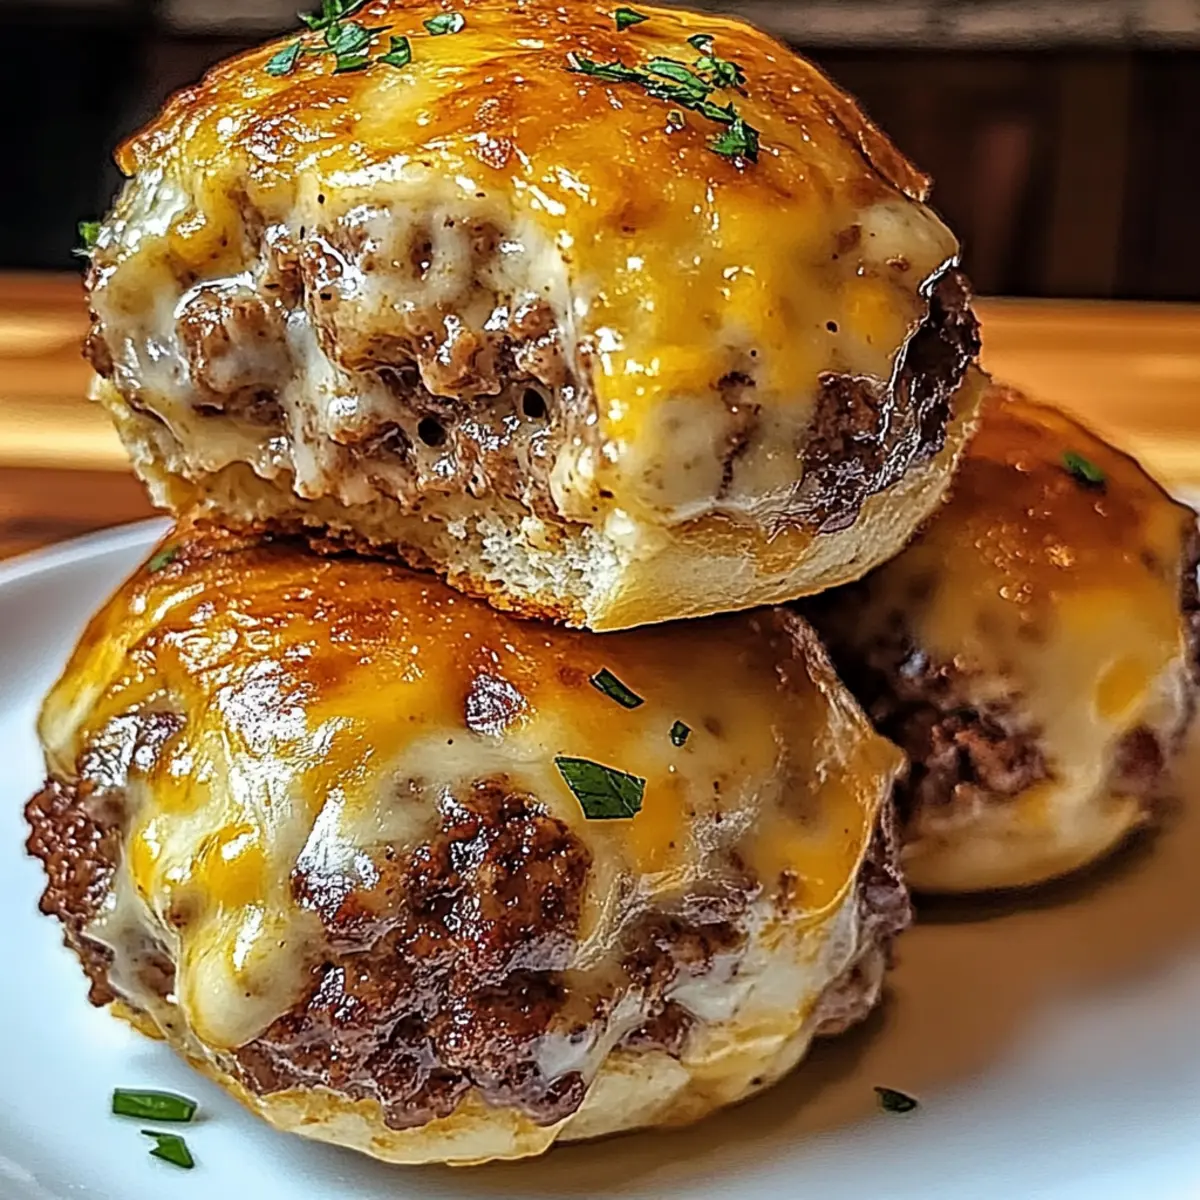
Arrange the sealed bombs on a baking sheet lined with parchment paper, spacing them about an inch apart. Bake in the preheated oven for 18-20 minutes until golden brown and puffed up, and you can smell the rich aroma wafting through your kitchen. Keep an eye on them towards the end, as you want that perfect crispiness on the outside while maintaining a juicy filling inside.
Step 5: Finish and Serve
Once baked, remove the baking sheet from the oven and let the Garlic Parmesan Cheeseburger Bombs cool for about 5 minutes. This cooling time allows the flavors to meld even more, while also ensuring you won’t burn your mouth as you dive in. Serve warm with your favorite dipping sauces, like ketchup or ranch, for an irresistible appetizer or snack that’s sure to impress all your guests!
What to Serve with Garlic Parmesan Cheeseburger Bombs
These cozy bites are just the start of a delightful meal that will leave everyone smiling and satisfied.
-
Crispy Tater Tots: These classic bites add a crunchy texture that pairs perfectly with the soft, cheesy bombs. Dipped in ketchup, they’ll evoke memories of childhood favorites.
-
Fresh Garden Salad: A vibrant mix of leafy greens, cherry tomatoes, and cucumbers provides a refreshing contrast to the rich flavors of the bombs. Toss with a light vinaigrette for a clean finish.
-
Garlic Aioli: This creamy dip enhances the garlic flavor while adding a smooth, luxurious element. It’s the perfect complement to elevate your snack game!
-
Classic Coleslaw: The crunch and tang from coleslaw make it a delightful side that balances the richness of the cheeseburger bombs. Plus, it adds a splash of color to your plate!
-
Sweet Potato Fries: The sweetness of the fries contrasts beautifully with the savory bombs, creating a delicious harmony of flavors. They’re a fun and healthier alternative too!
-
Beer or Sparkling Cider: Pair these delightful bombs with a cold drink. A light lager or crisp sparkling cider enhances the meal, making every bite even more enjoyable.
-
Mini Fruit Cups: Fresh fruit cups add a sweet note to the meal and cleanse the palate, creating a delightful balance after those hearty bites. Consider seasonal fruits for varied flavors!
Let your imagination run wild as you craft the perfect meal around these irresistible Garlic Parmesan Cheeseburger Bombs!
Make Ahead Options
These Garlic Parmesan Cheeseburger Bombs are perfect for meal prep, making weeknight dinners a breeze! You can prepare the beef mixture up to 24 hours in advance and store it in the refrigerator—this allows the flavors to deepen as they marinate. Additionally, you can assemble the bombs entirely and keep them in the fridge for up to 3 days before baking. Just cover them tightly with plastic wrap to maintain freshness and prevent drying out. When you’re ready to enjoy, simply bake them straight from the fridge, adding an extra 2-3 minutes to the cooking time for that golden-brown perfection. Trust me, they’ll be just as delicious and captivating as if made fresh!
Storage Tips for Garlic Parmesan Cheeseburger Bombs
Fridge: Store leftover Garlic Parmesan Cheeseburger Bombs in an airtight container for up to 3 days to maintain freshness and flavor.
Freezer: For longer storage, freeze the assembled but unbaked bombs in a single layer on a baking sheet. Once frozen solid, transfer them to a freezer-safe bag and enjoy within 3 months.
Reheating: To reheat, bake from frozen in a preheated oven at 375°F (190°C) for about 25-30 minutes, or until heated through and the dough becomes crisp again.
Room Temperature: If serving at a gathering, keep the bombs at room temperature for up to 2 hours. After that, be sure to store them in the fridge to ensure quality.
Garlic Parmesan Cheeseburger Bombs Variations
Feel free to let your creativity shine and customize these bombs to suit your taste buds!
-
Cheese Swap: Replace Parmesan with cheddar or pepper jack for a cheesy twist that adds different flavor profiles.
-
Veggie Boost: Stir in diced onions or bell peppers to the beef mixture for added flavor and nutrition, making the bombs even heartier.
-
Spicy Kick: Mix in a tablespoon of chili sauce or sriracha into the beef mixture for a delightful kick that spice lovers will enjoy.
-
Herb Boost: Toss in some fresh herbs like chopped parsley or cilantro in the filling for a vibrant flavor that elevates each bomb.
-
Gluten-Free Option: Use gluten-free biscuit dough to cater to dietary needs while still maintaining that delicious taste and texture.
You can also experiment with preparing a batch of freezer-friendly meals. Make these bombs ahead of time, freeze them, and pop them in the oven for an easy treat!
Expert Tips for Garlic Parmesan Cheeseburger Bombs
-
Mix Evenly: Ensure the ground beef and garlic are blended thoroughly for a consistent flavor. Uneven distribution can lead to some bites lacking that delicious garlic punch.
-
Seal Properly: Take your time sealing the dough well around the filling. This helps prevent leaks during baking, ensuring your Garlic Parmesan Cheeseburger Bombs stay intact and crispy.
-
Don’t Overstuff: Keep the filling moderate to avoid bursting during cooking. Overstuffing can lead to messy bombs and uneven baking, so stick to a tablespoon’s worth of filling.
-
Watch the Bake Time: Ovens vary, so check on your bombs a couple of minutes before the timer goes off. Look for a golden-brown color for that perfect crispy finish!
-
Customize with Love: Feel free to experiment with spices or add-ins like diced peppers for a twist. Your personal touches can elevate these Garlic Parmesan Cheeseburger Bombs even further!
Garlic Parmesan Cheeseburger Bombs Recipe FAQs
What type of ground beef is best for Garlic Parmesan Cheeseburger Bombs?
For the best flavor and texture, I recommend using ground beef with a fat content of about 80/20. This mix ensures a juicy filling. If you’re looking for a leaner option, ground turkey or chicken can work too, just be sure to season them well since they have milder flavors.
How should I store leftover Garlic Parmesan Cheeseburger Bombs?
Store any leftovers in an airtight container in your refrigerator for up to 3 days. This keeps them fresh and ready to enjoy! Just remember to reheat them in the oven for a few minutes to restore their delicious crispiness before diving back in.
Can I freeze Garlic Parmesan Cheeseburger Bombs?
Absolutely! To freeze, assemble the bombs but do not bake them. Place them on a baking sheet in a single layer and freeze until solid. Once frozen, transfer them to a freezer-safe bag and keep them in the freezer for up to 3 months. When you’re ready to enjoy them, bake directly from the freezer at 375°F (190°C) for about 25-30 minutes or until golden brown.
What happens if my dough doesn’t seal properly?
If your bombs aren’t sealed well, the filling might ooz out during baking. To avoid this, make sure to pinch and fold the edges of the dough securely around the filling. If they still leak, don’t worry! Just enjoy them as “deconstructed” bombs; they’ll still taste fantastic!
Can I make these bombs vegetarian or vegan?
Yes, you can! For a vegetarian alternative, substitute the ground beef with a mixture of sautéed mushrooms and diced veggies, or use a plant-based meat substitute. If you’re aiming for a vegan dish, make sure to use vegan cheese and biscuit dough without dairy ingredients.

Garlic Parmesan Cheeseburger Bombs for Ultimate Comfort Food
Equipment
- mixing bowl
- Baking Sheet
- Pizza Cutter
- Parchment Paper
Ingredients
For the Filling
- 1 pound Ground Beef Substitute with ground turkey or chicken if desired.
- 3 cloves Garlic Fresh minced garlic is preferred.
- 1/2 cup Parmesan Cheese Can swap with mozzarella if desired.
- to taste Seasoning (salt, pepper, etc.) Adjust according to taste preferences.
For the Dough
- 1 can Biscuit Dough Ensure good quality; substitutes like crescent rolls work as well.
Instructions
Step-by-Step Instructions
- In a medium mixing bowl, combine the ground beef, minced garlic, and seasonings. Mix thoroughly.
- Preheat your oven to 375°F (190°C). Roll out the biscuit dough to about 1/4-inch thick and cut into 4-inch squares or rounds.
- Place a spoonful of the beef mixture at the center of each dough piece. Fold and pinch edges to seal.
- Arrange on a baking sheet lined with parchment paper and bake for 18-20 minutes until golden brown.
- Allow to cool for 5 minutes before serving with your favorite dipping sauces.