
")

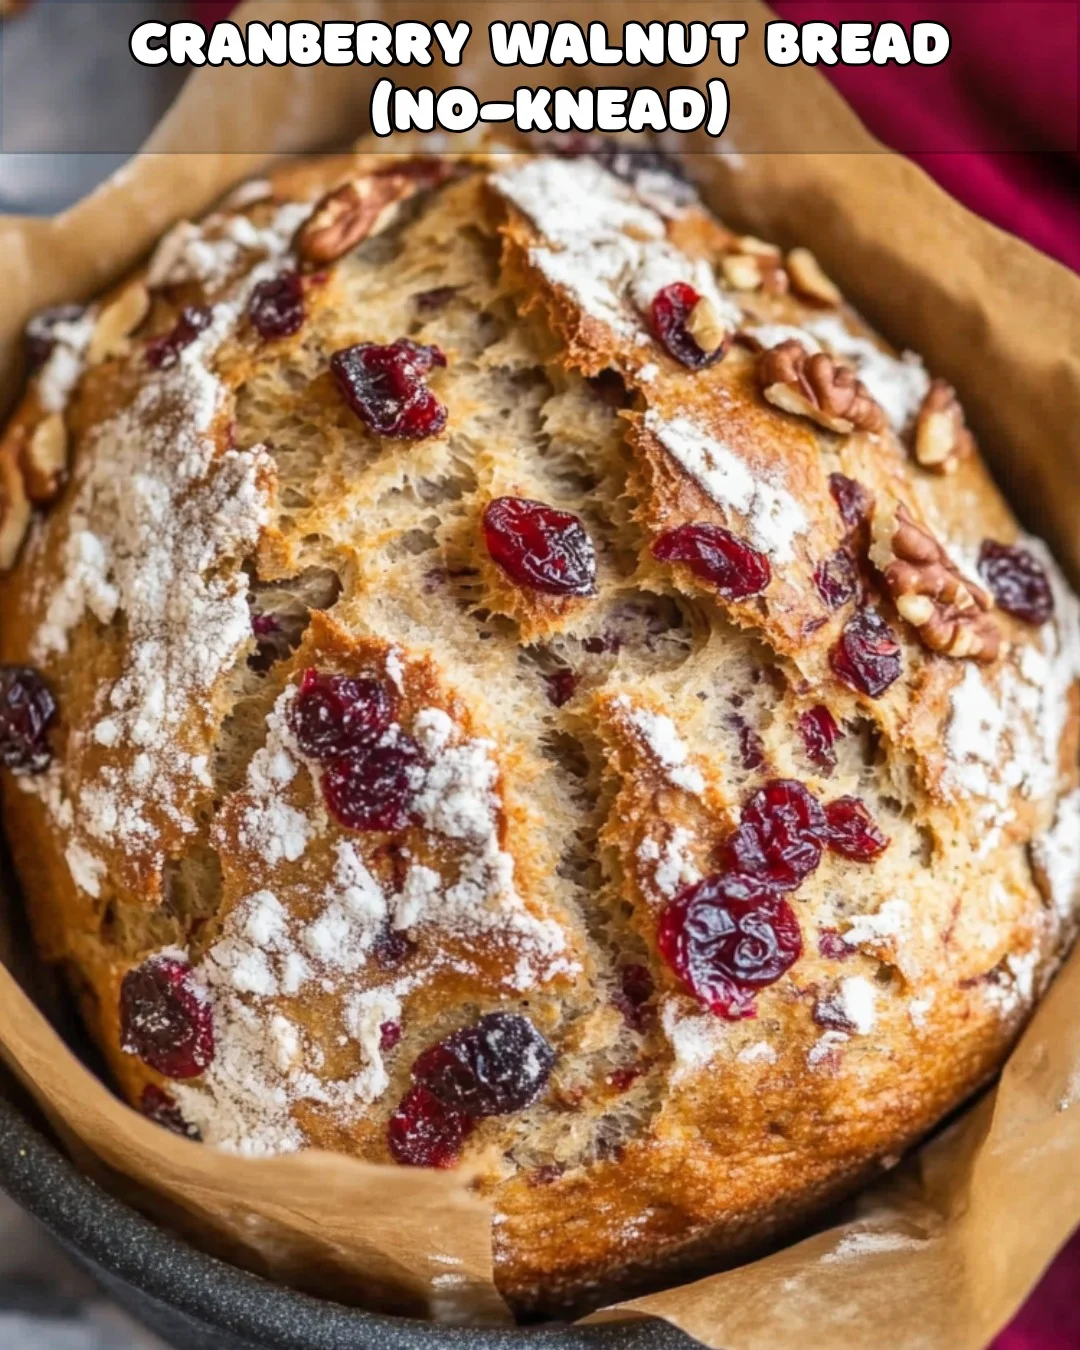
Imagine the aroma of freshly baked bread wafting through your kitchen. You cut into a golden, crackly crust to reveal a tender, slightly tangy crumb dotted with chewy cranberries, crunchy walnuts, and a hint of orange zest. This is the magic of No-Knead Cranberry Walnut Bread with a Touch of Citrus—a simple yet gourmet recipe that will elevate your bread-making game. Whether you’re a beginner or a seasoned baker, this no-knead bread is sure to become a favorite.
Why You’ll Love This Recipe
- No Kneading Required: Perfect for busy schedules or those new to bread-making.
- Complex Flavor, Simple Steps: The long fermentation time develops rich flavors without any extra effort.
- Cranberry & Walnut Combo: A perfect balance of sweet and nutty flavors, with a refreshing citrus twist.
- Beautifully Rustic: Each loaf looks artisanal with its crackly crust and chewy crumb.
- Versatile: Enjoy it plain, with butter, or paired with your favorite cheese or jam.
Ingredients for No-Knead Cranberry Walnut Bread with a Touch of Citrus
Here’s what you need to make this delicious bread:
| Ingredient | Amount | Notes |
|---|---|---|
| Active dry yeast | ½ teaspoon | For fermentation |
| Warm water | 1 ½ cups | 110–115°F, ensures proper yeast activation |
| Granulated sugar | 1 teaspoon | Feeds the yeast |
| Kosher salt | 2 teaspoons | Enhances flavor |
| Bread flour | 3 cups + 2 tbsp | Provides structure |
| Dried cranberries | ¾ cup | Adds sweetness |
| Walnuts | ½ cup, roughly chopped | For crunch |
| Honey | 1 tablespoon | Adds subtle sweetness |
| Orange zest | 1 tablespoon | Brings a refreshing citrus aroma |
Step-by-Step Instructions
1. Activate the Yeast
Start by dissolving the yeast and sugar in warm water in a large mixing bowl. Let it sit for 5–10 minutes until it becomes foamy. This step ensures your yeast is alive and ready to work.
2. Mix the Dough
Add honey, Kosher salt, and orange zest to the yeast mixture, stirring well. Gradually mix in the flour until a shaggy dough forms. Fold in the dried cranberries and walnuts, ensuring they’re evenly distributed throughout the dough. Expect a sticky texture—this is normal!
3. Let the Dough Rest
Cover the bowl with plastic wrap or a clean kitchen towel. Let the dough rest at room temperature for 12–18 hours. During this time, the yeast will slowly ferment, creating depth of flavor and a bubbly texture.

4. Shape the Dough
After the resting period, the dough should have doubled in size and appear bubbly. Turn it out onto a well-floured surface and shape it into a round loaf. Be gentle and avoid overworking the dough to maintain its airy structure.
5. Prepare for Baking
Place the shaped dough onto a piece of parchment paper. Cover it with a towel and let it rest for another 30–60 minutes while preheating your oven to 450°F (230°C). Put a Dutch oven or heavy lidded pot in the oven during preheating to ensure it’s thoroughly heated.
6. Bake the Bread
Carefully remove the preheated Dutch oven. Use the parchment paper to transfer the dough into the hot pot. Cover with the lid and bake for 30 minutes. Remove the lid and bake for another 10–15 minutes, or until the crust is golden brown.
7. Cool and Serve
Transfer the baked bread to a cooling rack and let it cool completely before slicing. This allows the crumb to set and the flavors to meld. Slice and enjoy with butter, jam, or your favorite spread.
The Secret to Perfect No-Knead Bread
Hydration Is Key
A sticky dough is necessary for a moist crumb and open structure. Don’t be tempted to add too much flour.

The Power of Time
The extended fermentation period builds flavor complexity, so be patient and let the dough rest overnight.
Preheating the Dutch Oven
A hot pot creates steam that contributes to a beautifully crackly crust. Don’t skip this step!
How to Customize Your Bread
- Add Seeds: Sprinkle chia seeds, flaxseeds, or sesame seeds on top before baking for extra texture.
- Swap Nuts: Replace walnuts with pecans, almonds, or hazelnuts for a different flavor profile.
- Try Different Dried Fruits: Substitute cranberries with raisins, chopped dates, or dried cherries.
- Make It Savory: Leave out the cranberries and orange zest, and add herbs like rosemary or thyme.
Serving Suggestions
- Breakfast: Toasted slices with a smear of butter or cream cheese.
- Snack: Pair with a dollop of honey or your favorite jam.
- Cheese Board: Serve alongside cheeses, olives, and cured meats for a gourmet touch.
- Soup Companion: Enjoy a slice dipped in hearty soups like tomato or butternut squash.
Nutritional Information (Per Slice)
| Nutrient | Amount |
|---|---|
| Calories | ~170 |
| Protein | ~5 g |
| Carbohydrates | ~30 g |
| Fat | ~5 g |
| Fiber | ~2 g |
Note: Nutritional values may vary depending on ingredient brands and serving size.
FAQs About No-Knead Cranberry Walnut Bread
1. Can I use all-purpose flour instead of bread flour?
Yes, but bread flour provides better structure and chewiness due to its higher protein content.
2. How do I store leftover bread?
Store the bread in a paper bag or loosely wrapped in plastic at room temperature for up to 2 days. For longer storage, slice and freeze it.
3. Can I make this bread gluten-free?
Gluten-free flours may require adjustments to the recipe. Consider using a gluten-free bread flour blend for best results.
4. Can I skip the Dutch oven?
You can bake the bread on a baking sheet, but the crust won’t be as crisp. Place a tray of water in the oven to mimic steam.
5. How do I know when the bread is done?
Tap the bottom of the loaf—it should sound hollow. Alternatively, the internal temperature should reach 200°F (93°C).
6. Can I add fresh cranberries instead of dried?
Fresh cranberries add tartness but may make the dough wetter. Adjust the flour as needed to compensate.
Why You Should Try This Recipe Today
This No-Knead Cranberry Walnut Bread with a Touch of Citrus combines the ease of no-knead methods with the elegance of artisanal flavors. From the subtle tang of cranberries to the nutty crunch of walnuts and the zesty burst of orange, each slice is a celebration of taste and texture. Whether you’re baking for a cozy family meal or impressing guests, this recipe will never disappoint.