
")

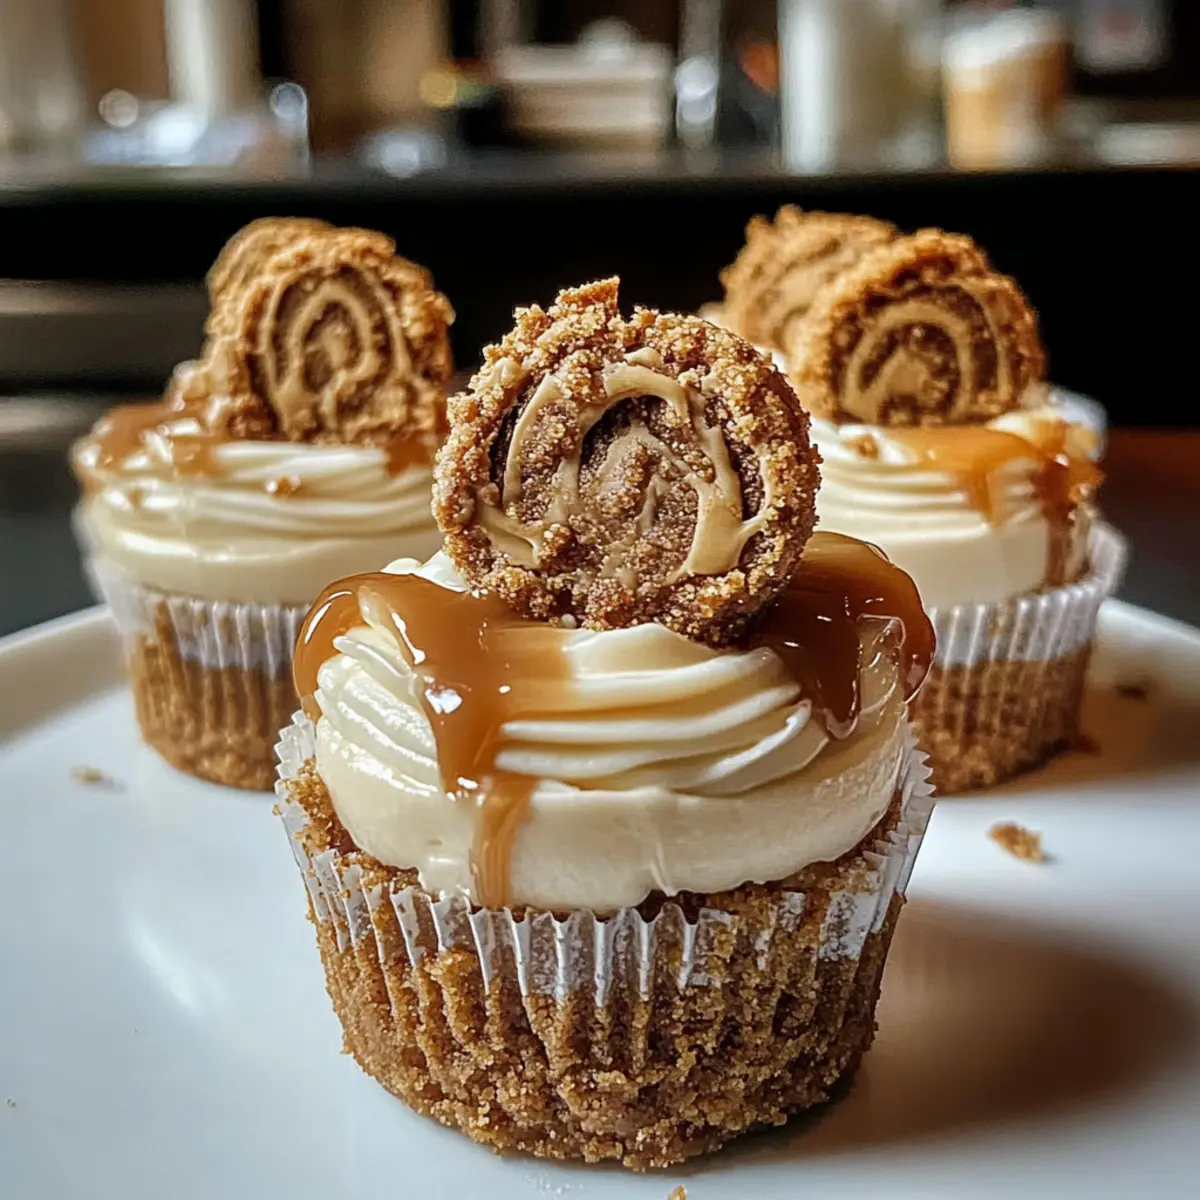
As I stood in my kitchen surrounded by various ingredients, my eyes landed on an enticing jar of cookie butter. The thought of creating No-Bake Cookie Butter Cheesecake Cups filled me with excitement! These delightful treats blend the smooth, creamy richness of cheesecake with a buttery cookie crust, all beautifully infused with the sweet, spiced flavor of cookie butter. What makes these cups even more irresistible is their quick prep time—perfect for busy weeknights or spontaneous gatherings. Plus, being no-bake means anyone can whip them up, regardless of their skill level. Imagine the joy they’ll bring when you serve them to family and friends! Are you intrigued by how to make this easy indulgence? Let’s dive into the recipe together!

Why are Cookie Butter Cheesecake Cups irresistible?
Decadent, creaminess: These cheesecake cups marry the silky texture of creamy filling with a deliciously buttery cookie crust.
No-bake convenience: Perfect for busy lifestyles, this quick and easy recipe saves you time while impressing guests.
Flavor explosion: The dreamy blend of cookie butter adds a unique depth that transforms each bite into a heavenly experience.

Versatile variations: Feel free to experiment by mixing in chocolate or fruit compote, tailoring the recipe to your taste.
Crowd-pleaser: Treats like these are always a hit at gatherings, ensuring smiles all around. Enjoy these delightful Cookie Butter Cheesecake Cups at your next event!
Cookie Butter Cheesecake Cups Ingredients
For the Crust
• 1 cup Biscoff or speculoos cookie crumbs – Provides a buttery, sweet crust; substitute with graham cracker crumbs if necessary.
• 3 tbsp melted butter – Binds the cookie crumbs together to form the crust; adjust amount for different cookie types if needed.
For the Filling
• 8 oz cream cheese, softened – The main ingredient for richness and creaminess; ensure it’s at room temperature for best blending.
• ¾ cup powdered sugar – Sweetens the filling; adjust according to your taste preferences.
• ½ cup cookie butter (plus extra for drizzling) – Adds delectable flavor to the cheesecake; try Nutella for a different twist.
• 1 tsp vanilla extract – Enhances flavor; use pure extract for the best results.
• 1 cup heavy whipping cream – Whipped to stiff peaks for lightness; for a lighter version, consider reduced-fat cream cheese.
For Garnishing
• Extra cookies for garnish (optional) – Adds a decorative touch and enhances the flavor, or replace with fresh berries for a fruity option.

Step‑by‑Step Instructions for Cookie Butter Cheesecake Cups
Step 1: Prepare the Crust
In a medium bowl, combine 1 cup of Biscoff cookie crumbs with 3 tablespoons of melted butter. Mix until the texture resembles wet sand, ensuring all crumbs are well-coated. This buttery mixture will create a delectable base for your Cookie Butter Cheesecake Cups.
Step 2: Form the Bottom Layer
Spoon the crumb mixture into the bottoms of small cups or jars. Using the back of a spoon or your fingers, firmly press the mixture down to form an even, compact crust layer. This step is crucial for a sturdy foundation that will hold your creamy filling together beautifully.
Step 3: Make the Filling
In a separate bowl, beat 8 ounces of softened cream cheese using an electric mixer on medium speed for about 2 minutes, until smooth and creamy. The cream cheese should have no lumps for a velvety filling in your Cookie Butter Cheesecake Cups.
Step 4: Add Sweetness and Flavor
Gradually mix in ¾ cup of powdered sugar, ½ cup of cookie butter, and 1 teaspoon of vanilla extract to the cream cheese. Blend until the mixture is fully combined and fluffy, creating a rich filling that exudes the delicious flavors of cookie butter.
Step 5: Whip the Cream
In a clean mixing bowl, whip 1 cup of heavy whipping cream using an electric mixer until stiff peaks form, which typically takes about 3-4 minutes. This whipped cream will lighten the filling, providing a delightful airy texture to your Cookie Butter Cheesecake Cups.
Step 6: Combine and Fold
Gently fold the whipped cream into the creamy mixture using a spatula, being careful to retain the airiness. This step ensures that your filling remains fluffy and delicious. Once combined, you’ll have a luscious filling ready for your cheesecake cups.
Step 7: Fill the Cups
Spoon the cheesecake filling generously into each prepared cup, filling them to the top for a delightful treat. Use a spatula or the back of a spoon to smooth the tops for an attractive finish.
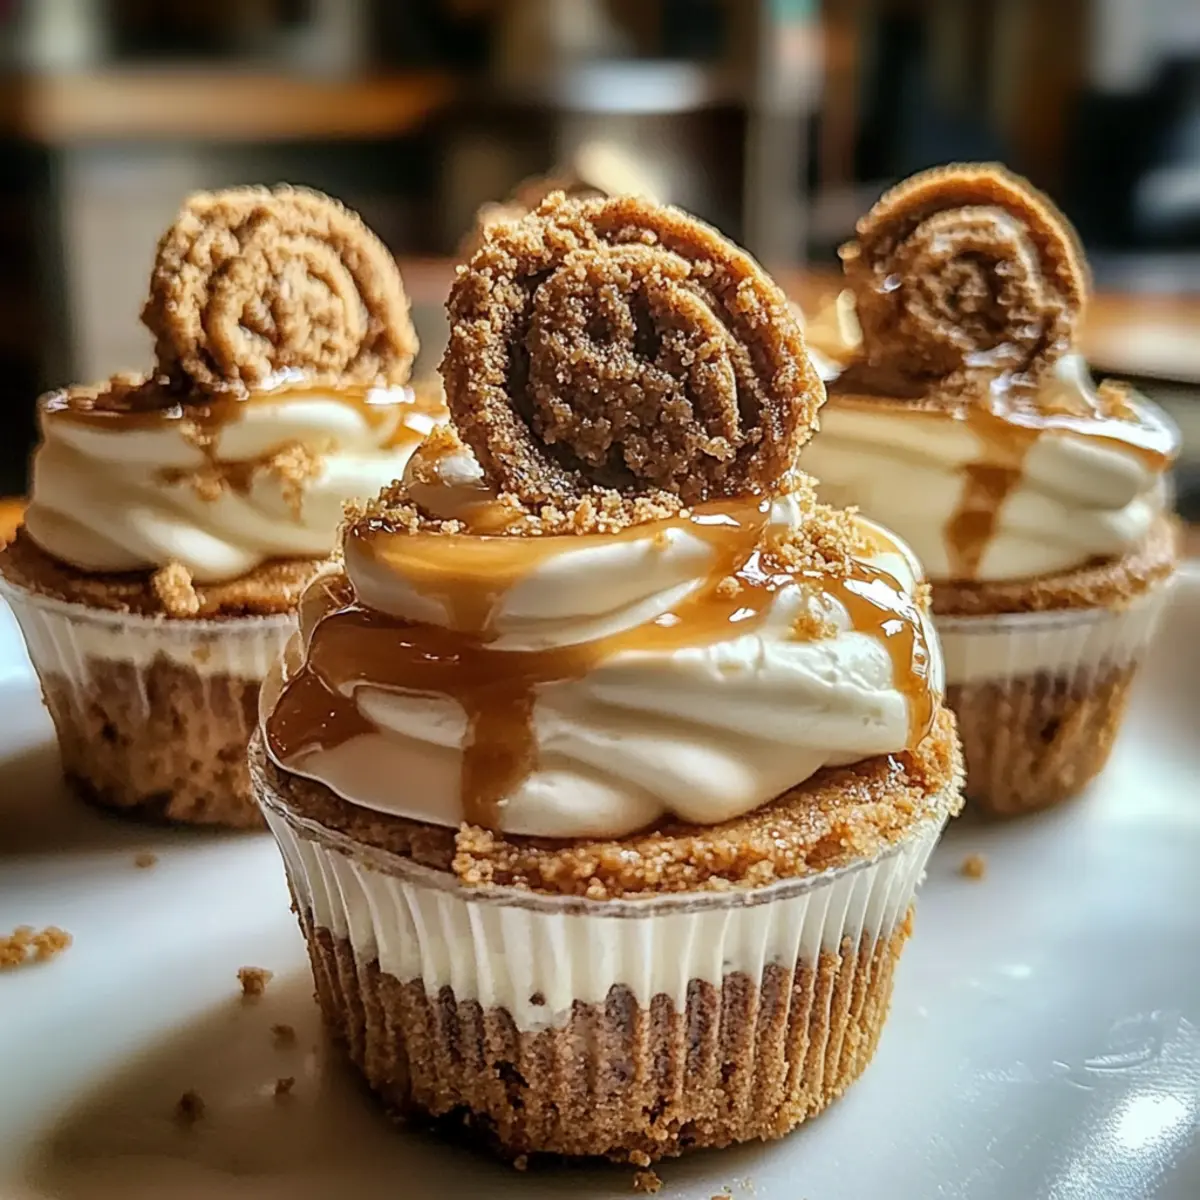
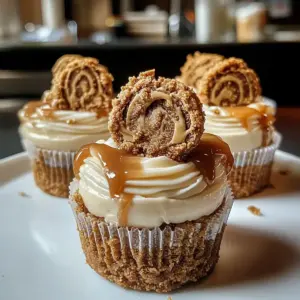
Step 8: Drizzle with Cookie Butter
Drizzle extra cookie butter over the tops of your filled cups, adding another layer of flavor and visual appeal. This step gives your Cookie Butter Cheesecake Cups a beautiful and tempting look that your friends and family will love.
Step 9: Chill and Set
To let the flavors meld and the filling set, place your cheesecake cups in the refrigerator for at least 2 hours. Once chilled, the cheesecake cups will acquire the perfect consistency, making them a delicious and indulgent dessert to enjoy.
Expert Tips for Cookie Butter Cheesecake Cups
-
Room Temperature Cream Cheese: Ensure cream cheese is at room temperature for smooth blending; cold cream cheese can lead to a lumpy filling.
-
Gradual Sweetness: Add powdered sugar slowly while mixing to achieve your desired sweetness without overpowering the cheesecake flavor.
-
Light and Fluffy: When whipping heavy cream, stop at stiff peaks to maintain airiness; overwhipping can lead to a grainy texture in your filling.
-
Chilling Time: Be patient with the chilling process—allowing the cups to set in the refrigerator for at least 2 hours ensures the best texture and flavor development.
-
Storage Tips: Keep these Cookie Butter Cheesecake Cups covered in the refrigerator; they stay fresh for up to 4 days, but they’re best enjoyed within the first couple of days.
Storage Tips for Cookie Butter Cheesecake Cups
Fridge: Keep your Cookie Butter Cheesecake Cups covered in the refrigerator for up to 4 days. This will help maintain their creamy texture and flavor.
Freezer: Avoid freezing, as the texture of these cheesecake cups can change upon thawing. They are best enjoyed fresh.
Reheating: These no-bake treats are served chilled, so there’s no need to reheat! Just take them out of the fridge when you’re ready to indulge.
Serving: Allow your cheesecake cups to sit at room temperature for about 10 minutes before serving. This enhances their creamy texture and flavor!
Cookie Butter Cheesecake Cups Variations
Get ready to have fun customizing your delightful dessert, adding a touch of personal flavor to the cheesecake experience!
-
Chocolate Lovers: Mix in 2 tablespoons of cocoa powder to the filling or fold in mini chocolate chips for a decadent twist. This adds rich notes of chocolate that pair wonderfully with cookie butter.
-
S’mores Delight: Top each cheesecake cup with toasted mini marshmallows and crushed graham crackers. This variation offers a nostalgic campfire taste that everyone will adore!
-
Fruity Layers: Incorporate fresh fruit compote between the crust and filling for a refreshing burst of flavor. Berries like raspberries or strawberries can contrast beautifully with the rich creaminess.
-
Nutty Bliss: Swap the cookie butter for almond butter or sunflower seed butter, creating a nutty flavor profile that’s equally delicious. The change in nutty butter can bring out new dimensions in the dessert.
-
Gourmet Spice: Add ½ teaspoon of cinnamon or pumpkin pie spice to the filling for a warm, festive flavor. This gives the cheesecake cups a cozy feel, perfect for fall gatherings.
-
Vegan Adaptation: Use a vegan cream cheese alternative and coconut whipped cream for a plant-based version. Trade the butter for coconut oil to maintain a rich texture with a delightful hint of coconut flavor.
-
Salted Caramel Twist: Drizzle salted caramel sauce instead of extra cookie butter on top before serving. The sweet and salty notes can elevate these cups into something truly indulgent.
-
Minty Freshness: Incorporate a few drops of peppermint extract into the filling for a refreshing mint flavor. Perfect for a holiday-themed treat or just to add a refreshing touch to your dessert!
Feel free to explore these fun variations and make these Cookie Butter Cheesecake Cups your own, ensuring every bite is tailored to your taste preferences!
What to Serve with No-Bake Cookie Butter Cheesecake Cups
Elevate your dessert experience with delightful pairings that enhance the creamy bliss of these cheesecake cups.
- Fresh Berries: The tartness of strawberries or blueberries cuts through the richness, adding a burst of freshness to each bite.
- Whipped Cream: A dollop of light, fluffy whipped cream complements the creamy texture, offering an airy contrast to the cheesecake cups.
- Chocolate Ganache: The rich, velvety chocolate ganache drizzled on top brings an indulgent twist that makes each cup even more decadent.
- Coffee or Espresso: The bitter notes of coffee perfectly balance the sweetness, making it a great pairing to savor alongside your cheesecake cups.
- Homemade Caramel Sauce: A drizzle of warm caramel adds a gooey sweetness that beautifully harmonizes with the cookie butter flavors.
- Ice Cream: A scoop of vanilla or cookie dough ice cream alongside the cheesecake cups creates a delightful textural contrast and extra creaminess.
- Nutty Trail Mix: A sprinkle of nutty trail mix on top introduces a crunchy element that complements the silky cheesecake and buttery crust well.
- Mint Tea: A refreshing cup of mint tea cleanses the palate and rounds off the sweet experience with a light herbal note.
Make Ahead Options
These delightful Cookie Butter Cheesecake Cups are perfect for meal prep, allowing you to enjoy the rich flavors with minimal last-minute effort! You can prepare the cookie crust and filling up to 24 hours in advance. Simply combine the cookie crumbs with melted butter and press into cups, then refrigerate. The filling can be made and stored separately; just keep it in an airtight container. When you’re ready to serve, simply fill the prepped crusts with the cheesecake mixture and drizzle with extra cookie butter. This way, you’ll have a stunning dessert ready to impress, making your busy weeknights a little sweeter with delicious homemade treats!

Cookie Butter Cheesecake Cups Recipe FAQs
How do I select the best cookie crumbs for the crust?
I recommend using Biscoff or speculoos cookie crumbs for the most authentic flavor and texture. Look for crumbs that are fine and dry, as this will help create a sturdy base. If you’re using graham cracker crumbs instead, ensure they are well-crushed, as larger pieces might not bind as nicely with the melted butter.
How should I store my Cookie Butter Cheesecake Cups?
Store your cheesecake cups covered in the refrigerator for up to 4 days. Use an airtight container or cover them with plastic wrap to maintain their freshness and prevent any fridge odors from altering their delightful taste. Over time, the flavors meld together beautifully, making them even tastier after a day!
Can I freeze Cookie Butter Cheesecake Cups?
I advise against freezing these cheesecake cups, as the creamy texture can change upon thawing, resulting in a less enjoyable experience. They are best consumed fresh! However, if you must freeze them, place them in a single layer in an airtight container with parchment paper between layers, and consume within 1 month for the best quality.
What can I do if my filling isn’t smooth?
If your filling isn’t smooth, it’s likely due to the cream cheese being too cold or not beaten well enough. Make sure your cream cheese is at room temperature before mixing; this usually takes about 30 minutes out of the fridge. If it still has lumps, you can beat it for a bit longer or use a food processor to blend until smooth.
Are Cookie Butter Cheesecake Cups suitable for people with allergies?
These cheesecake cups contain dairy and gluten, so they may not be suitable for those with milk or wheat allergies. If you are catering to dietary restrictions, consider using gluten-free cookie crumbs and a dairy-free cream cheese alternative to adapt the recipe for your guests!
Delightful Cookie Butter Cheesecake Cups for a Sweet Escape
Equipment
- Medium bowl
- electric mixer
- spatula
- cups or jars
Ingredients
For the Crust
- 1 cup Biscoff or speculoos cookie crumbs Provides a buttery, sweet crust; substitute with graham cracker crumbs if necessary.
- 3 tbsp melted butter Binds the cookie crumbs together to form the crust.
For the Filling
- 8 oz cream cheese, softened Main ingredient for richness and creaminess; ensure it's at room temperature for best blending.
- ¾ cup powdered sugar Sweetens the filling; adjust according to taste preferences.
- ½ cup cookie butter Adds delectable flavor; try Nutella for a different twist.
- 1 tsp vanilla extract Enhances flavor; use pure extract for the best results.
- 1 cup heavy whipping cream Whipped to stiff peaks for lightness.
For Garnishing
- Extra cookies for garnish Optional; can replace with fresh berries for a fruity option.
Instructions
Step-by-Step Instructions
- In a medium bowl, combine 1 cup of Biscoff cookie crumbs with 3 tablespoons of melted butter. Mix until the texture resembles wet sand.
- Spoon the crumb mixture into the bottoms of small cups or jars. Firmly press the mixture down to form an even crust layer.
- In a separate bowl, beat 8 ounces of softened cream cheese using an electric mixer on medium speed until smooth and creamy.
- Gradually mix in ¾ cup of powdered sugar, ½ cup of cookie butter, and 1 teaspoon of vanilla extract. Blend until fully combined.
- In a clean mixing bowl, whip 1 cup of heavy whipping cream using an electric mixer until stiff peaks form.
- Gently fold the whipped cream into the creamy mixture using a spatula, ensuring the filling remains fluffy.
- Spoon the cheesecake filling into each prepared cup, filling them to the top.
- Drizzle extra cookie butter over the tops of your filled cups.
- Place your cheesecake cups in the refrigerator for at least 2 hours to let the flavors meld and the filling set.