

")

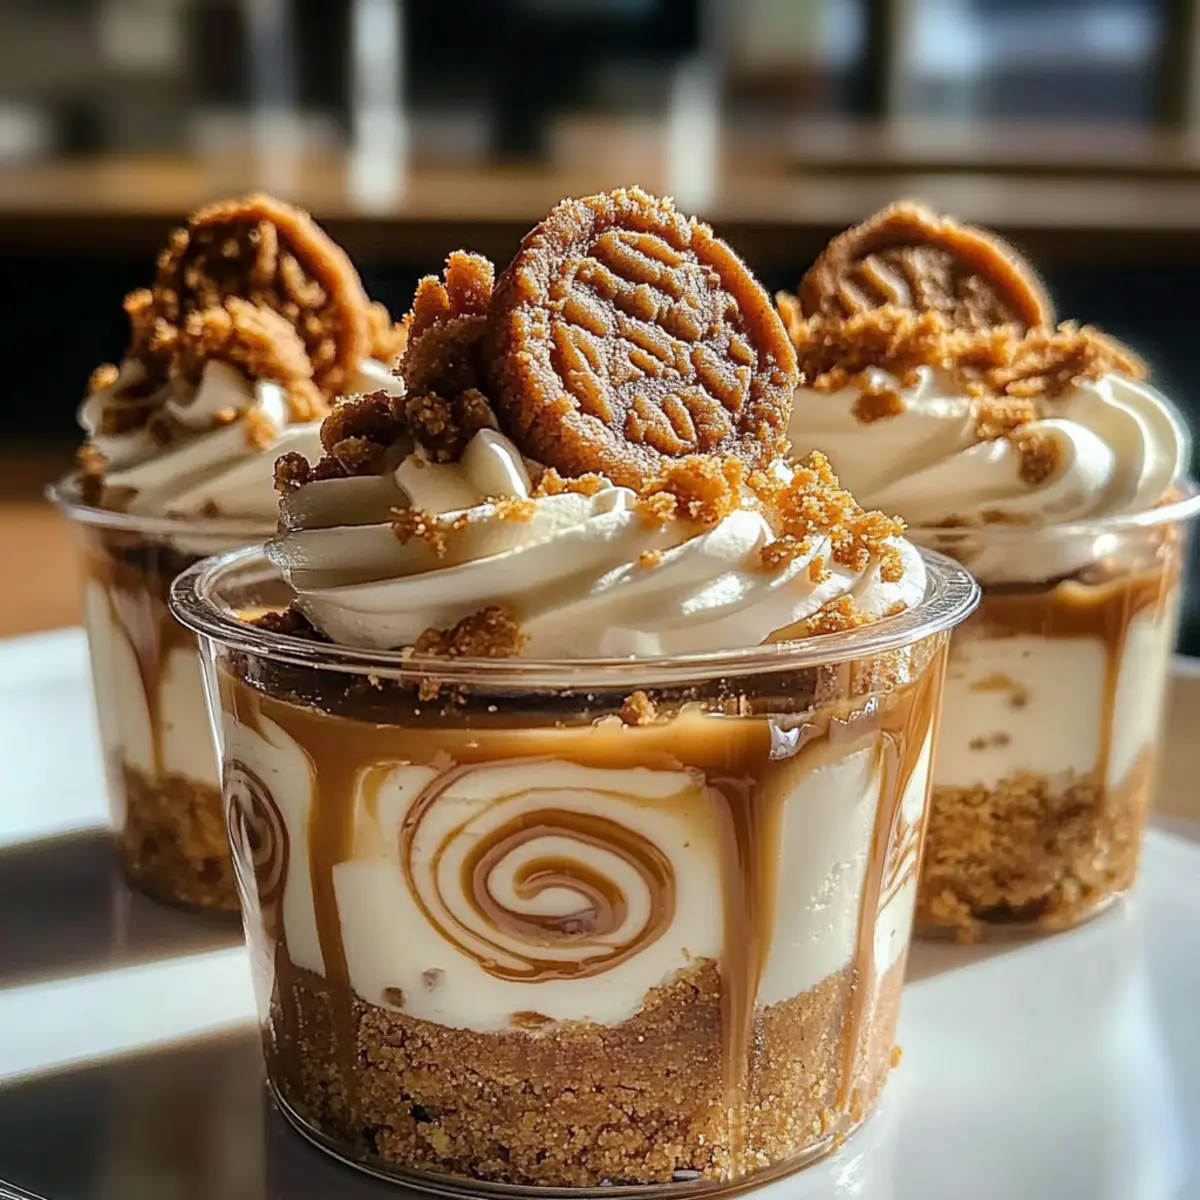
Creamy, dreamy, and utterly delightful—these No-Bake Cookie Butter Cheesecake Cups promise to whisk you away to dessert heaven! With a crunchy Biscoff cookie crust cradling a velvety filling, each bite is an indulgent experience that feels like a hug for your taste buds. What’s more, this no-bake recipe is a lifesaver during hot summer months, letting you impress friends and family without breaking a sweat. The best part? They’re so deliciously addictive, you may want to keep them all to yourself! Picture an effortlessly chic dessert that requires minimal effort but delivers maximum satisfaction—now that’s a sweet victory! Are you ready to whip up some magic in your kitchen?
Why are these Cheesecake Cups so special?
Simplicity at Its Finest: This no-bake recipe allows you to create a show-stopping dessert with minimal effort—perfect for busy weeks or impromptu gatherings.
Decadent Flavor: The luscious combination of cookie butter and cream cheese infuses each cup with rich, unforgettable taste.
Crunchy & Creamy Contrast: Enjoy the delightful juxtaposition of the crispy Biscoff cookie crust paired with a smooth, creamy filling that melts in your mouth.

Versatile Indulgence: Customize easily! You can switch up the cookie flavors or add fun toppings to cater to different preferences, making them perfect for any occasion.
Time-Saving Delight: With just a couple of hours in the fridge, you can prepare these treats ahead and still wow your guests with a stunning dessert, as mentioned in our guide to no-bake dessert ideas.
Get ready to savor every bite of these Cookie Butter Cheesecake Cups—your new favorite dessert recipe awaits!
Cookie Butter Cheesecake Cups Ingredients
• To craft these delightful Cookie Butter Cheesecake Cups, gather the following ingredients:
For the Crust

- Biscoff or Speculoos Cookie Crumbs – The crunchy base that provides sweetness and texture; can substitute with graham cracker crumbs for a unique twist.
- Melted Butter – Binds the cookie crumbs together for a solid crust; coconut oil can be used for a dairy-free alternative.
For the Filling
- Cream Cheese (8 oz) – The star of the filling, adding a creamy richness; ensure it’s softened for easy mixing.
- Powdered Sugar (¾ cup) – Sweetens the filling and contributes to a smooth texture; feel free to reduce for a less sweet option.
- Cookie Butter (½ cup, plus extra for drizzling) – Elevates the flavor profile, enriching the filling; nut butter is an alternative for a different flavor experience.
- Vanilla Extract (1 tsp) – Enhances the aromatic quality of the filling; optional but recommended for an added depth.
- Heavy Whipping Cream (1 cup) – Whipped to create an airy lightness in the filling; coconut cream works perfectly for a dairy-free version.
For the Garnish
- Extra Cookies (for garnish) – Optional, adds a delightful crunch and a decorative element to your gorgeous cups.
Get ready to indulge in a no-bake wonder that is not only easy to whip up but will also leave your loved ones asking for seconds!
Step‑by‑Step Instructions for Cookie Butter Cheesecake Cups
Step 1: Prepare the Crust
In a mixing bowl, combine Biscoff cookie crumbs with melted butter, stirring until the mixture resembles wet sand. Using a tablespoon, press this mixture firmly into the base of 6 small dessert cups. Aim for an even layer, creating a delightful crunch that will hold your Cookie Butter Cheesecake Cups together. Set them aside while you prepare the filling.
Step 2: Make the Cream Cheese Mixture
In a large bowl, beat the softened cream cheese with powdered sugar, cookie butter, and vanilla extract using an electric mixer on medium speed. Continue mixing until the mixture is completely smooth and creamy, and no lumps remain—this should take about 2-3 minutes. The savory aroma of cookie butter will fill your kitchen, enticing everyone nearby.
Step 3: Whip the Cream
In a separate bowl, pour in the heavy whipping cream and whisk it until stiff peaks form, which usually takes about 3-5 minutes on medium-high speed. Once whipped, it will have a light and airy texture that’s perfect for folding into your cream cheese mixture. This step is crucial for achieving the fluffy consistency of the Cookie Butter Cheesecake Cups.
Step 4: Combine Mixtures
Gently fold the whipped cream into the cream cheese mixture with a spatula using a sweeping motion. Be careful not to deflate the whipped cream—this preserves the airy texture you just whipped up. Mix until combined and no streaks remain, creating a luxurious filling that will complement the crunchy crust beautifully.
Step 5: Fill the Dessert Cups
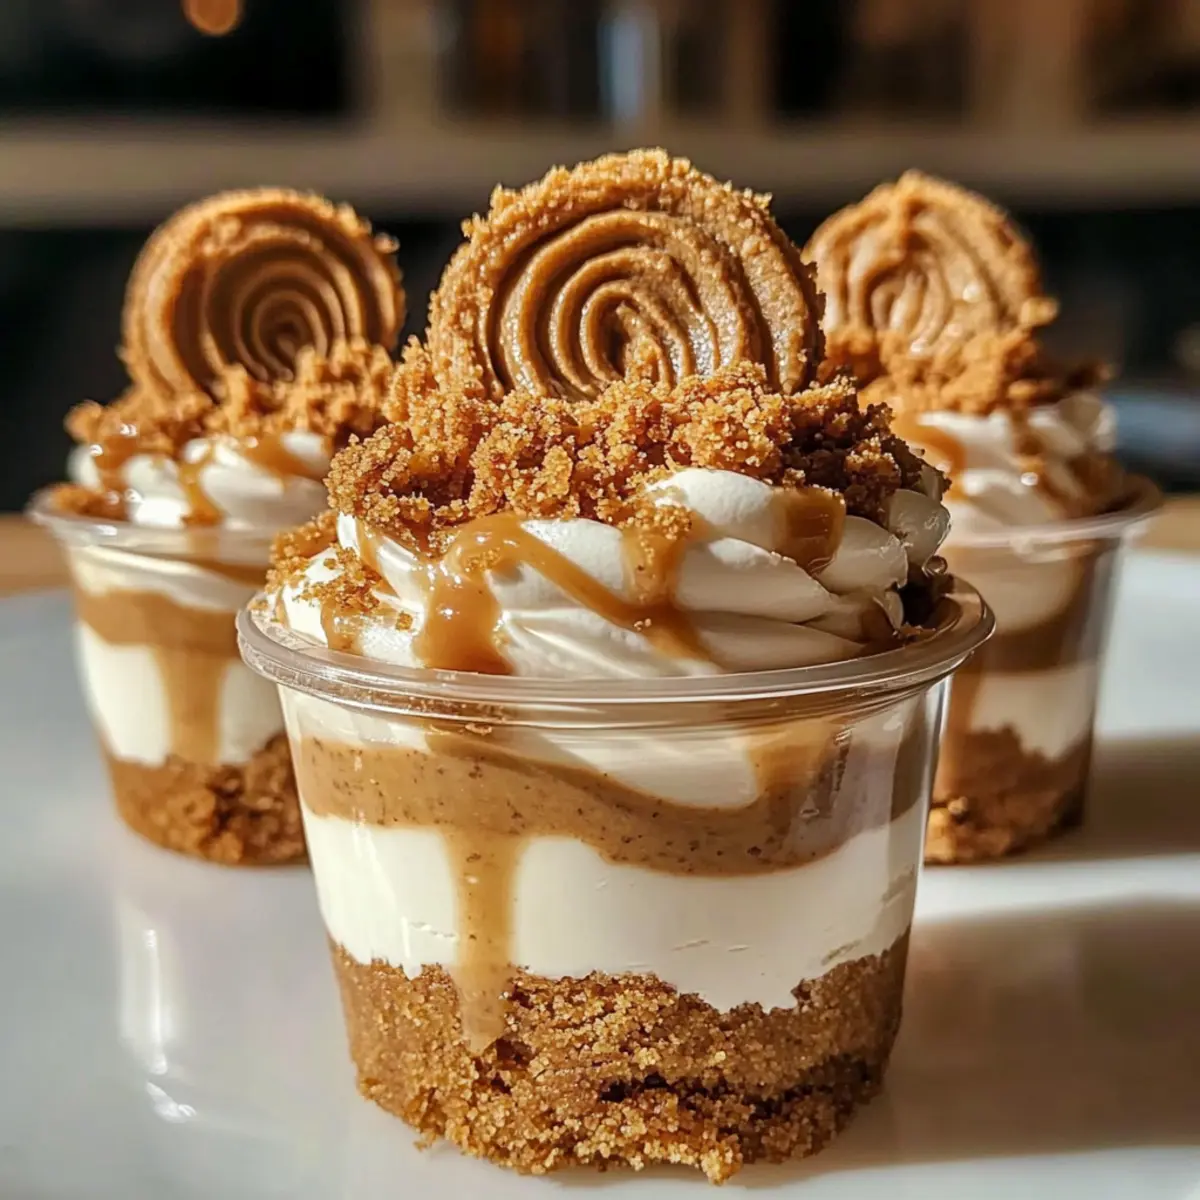
Spoon the decadent filling into your prepared crusts, distributing it evenly among the cups. Use a spatula or the back of a spoon to smooth out the tops for an elegant finish. Aim for a level surface that showcases the creamy filling, making each of your Cookie Butter Cheesecake Cups visually appealing.
Step 6: Chill the Cheesecake Cups
Cover the cups with plastic wrap and place them in the refrigerator. Allow the Cookie Butter Cheesecake Cups to chill for at least 2 hours, or preferably overnight, which enhances the flavors and textures. Make sure they are well-set before serving, as this will ensure each cup maintains its shape when you take a bite.
Step 7: Garnish and Serve
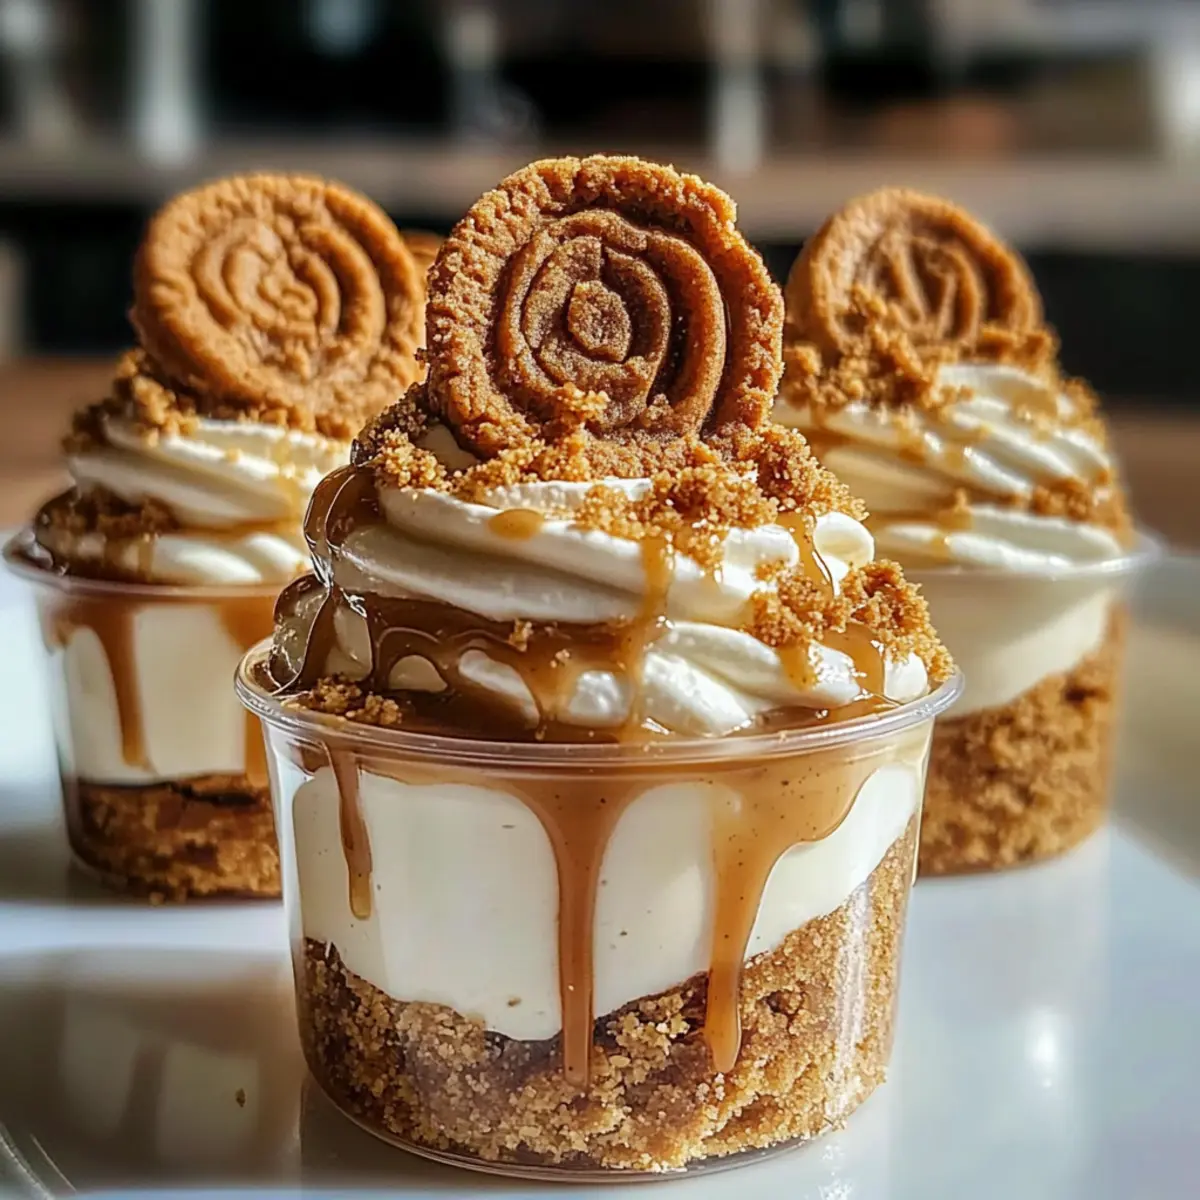
Once chilled, remove the cheesecake cups from the fridge. Drizzle additional cookie butter on top for extra flavor, and for a delightful touch, sprinkle some crushed cookies for garnishing. This final step not only elevates the presentation but also adds a tasty crunch that complements the smooth filling perfectly. Enjoy your delicious Cookie Butter Cheesecake Cups!
What to Serve with Cookie Butter Cheesecake Cups?
Treat yourself and your guests to a delightful feast with these enchanting dessert cups. Their creamy goodness can shine even brighter with the perfect pairings!
-
Fresh Berries: Juicy strawberries or blueberries provide a tart contrast, enhancing the richness of the cheesecake. Their vibrant colors make for a stunning presentation, too.
-
Whipped Cream: A dollop of freshly whipped cream adds an airy texture that complements the creaminess of the cups beautifully. It’s a classic touch that never disappoints!
-
Chocolate Drizzle: A silky chocolate drizzle brings a decadent twist, offering a delightful contrast to the cookie butter flavors. This indulgence elevates the overall dessert experience to new heights.
-
Tea or Coffee: A warm cup of chai tea or a rich espresso creates a harmonious balance with the sweetness of the cheesecake cups. The warmth punctuates every creamy bite for a perfect after-dinner treat.
-
Ice Cream: Consider serving a scoop of vanilla or caramel ice cream alongside for an irresistible scoop of creamy goodness. The melting ice cream will create a luscious combination on your plate.
-
Nutty Crumble: A sprinkle of toasted nuts like pecans or almonds adds a crunchy texture that contrasts beautifully with the creamy filling. This gives your dessert both richness and bite, delighting your taste buds.
Make Ahead Options
These Cookie Butter Cheesecake Cups are a dream for busy home cooks looking to save time! You can make the crust and filling up to 24 hours in advance to streamline your dessert preparations. Simply prepare the cookie crust and press it into the cups, then whip up the cream cheese filling and spoon it into the crusts. Cover the cups with plastic wrap and refrigerate them until you’re ready to serve. To maintain their delightful texture, chill them for at least 2 hours or even overnight—for the best flavor. Just before serving, drizzle with extra cookie butter and garnish with crushed cookies for a fresh and impressive finish!
How to Store and Freeze Cookie Butter Cheesecake Cups
Fridge: Store the cheesecake cups in an airtight container in the refrigerator for up to 3 days. This keeps them fresh and allows the flavors to meld beautifully.
Freezer: If you want to make them ahead of time, freeze the cups without garnishing for up to 1 month. When ready to enjoy, thaw them overnight in the fridge.
Reheating: These treats are best enjoyed chilled and do not require reheating. If frozen, always allow them to thaw completely before serving to maintain their creamy texture.
Cookie Butter Cheesecake Cups Variations
Feel free to let your creativity shine by customizing these delightful cheesecake cups to fit your taste buds!
- Chocolate Lovers: Incorporate cocoa powder into the filling or switch to chocolate cookies for the crust to give a rich, fudgy twist.
- Nutty Delight: Substitute cookie butter with creamy peanut butter, enriching the flavor with a luscious nutty finish that invites you to take another bite!
- Spice It Up: Add cinnamon or nutmeg to the filling for added warmth and depth, evoking comforting memories with every spoonful.
- Zesty Touch: Blend in some lemon zest to the cream cheese mixture for a refreshing citrus note that perfectly balances the sweetness.
- Fruit Fusion: Fold in crushed berries such as raspberries or strawberries for a burst of fruity flavor, creating little pockets of deliciousness throughout.
- Dairy-Free Version: Opt for coconut cream instead of heavy whipping cream and ensure the cream cheese is a dairy-free alternative to make these treats suitable for a vegan lifestyle.
- Texture Twist: Add chopped nuts or crisped rice cereal to the crust for an added crunchy layer that contrasts beautifully with the smooth filling.
- Cookie Crumb Topping: Use crushed Oreos or additional Biscoff cookies on top as a garnish for an even richer experience to please your palate.
Dive into more exciting variations, and take a look at our guide to no-bake dessert ideas for even more inspiration!
Expert Tips for Cookie Butter Cheesecake Cups
-
Room Temperature Cream Cheese: Ensure the cream cheese is at room temperature to avoid lumps in the filling, resulting in a smooth texture.
-
Gentle Folding: Use a spatula to gently fold the whipped cream into the cream cheese mixture. Avoid aggressive stirring to maintain the airy consistency crucial for these Cookie Butter Cheesecake Cups.
-
Chill Time Counts: Be patient and let the cheesecake cups chill for at least 2 hours, or preferably overnight. This helps enhance the flavor and sets the filling perfectly.
-
Crust Consistency: When mixing the cookie crumbs with melted butter, aim for a wet sand texture. This ensures a sturdy crust that holds up beautifully with the creamy filling.
-
Garnishing Options: Experiment with different toppings! Besides cookie crumbs, ideas include a sprinkle of sea salt, chopped nuts, or even a drizzle of chocolate for added indulgence.
Cookie Butter Cheesecake Cups Recipe FAQs
What type of cookie should I use for the crust?
Absolutely! The base of these Cookie Butter Cheesecake Cups is typically made from Biscoff or Speculoos cookie crumbs, which provide a perfect crunch and sweetness. However, if you’re looking for a different flavor profile, feel free to swap these with graham cracker crumbs. Just keep in mind that the taste will vary, but it will still be delicious!
How should I store the cheesecake cups?
To ensure your cheesecake cups stay fresh and delightful, store them in an airtight container in the fridge for up to 3 days. This way, they can be enjoyed within that timeframe while still retaining their creamy texture and amazing flavor. Keep in mind to let them chill for at least 2 hours after you prepare them for the best taste!
Can I freeze these cheesecake cups?
Definitely! If you want to prepare these treats ahead of time, you can freeze the cookie butter cheesecake cups without any garnishing for up to 1 month. To freeze, place them in a single layer in a freezer-safe container and make sure they are tightly sealed. When you’re ready to serve, simply transfer them to the refrigerator to thaw overnight. Enjoy them cold for the best experience!
What if my cheesecake filling is too runny?
Very! If you find that your cheesecake filling is runny, it might be due to the cream cheese not being fully softened or mixed properly. Make sure to beat the cream cheese, cookie butter, and powdered sugar until completely smooth. Additionally, you might want to check that you whipped the heavy cream to stiff peaks—this helps provide the needed structure. If you still encounter issues, chilling the cups longer can help firm up the filling!
Are there any common allergies I should be aware of?
Yes, it’s essential to consider allergies! The main ingredients—cream cheese and heavy cream—are dairy products, so those with lactose intolerance or dairy allergies should look for dairy-free alternatives, like coconut cream. Moreover, cookie butter often contains nuts, so if you’re serving guests with nut allergies, you might substitute it with sunbutter or simply stick to the creamy cheese blend without the added butter.
How long does it take for the flavors to develop after making them?
The flavors actually get better with time! For these Cookie Butter Cheesecake Cups, letting them chill in the fridge for at least 2 hours is necessary for them to set properly, but if you can wait longer—like overnight—prepare for an unbelievably rich flavor as the ingredients meld together beautifully. It’s worth the wait for the best creamy, dreamy bites!
Irresistible Cookie Butter Cheesecake Cups to Swoon Over
Equipment
- mixing bowl
- electric mixer
- spatula
- Measuring Cups and Spoons
- Whisk
- Dessert Cups
Ingredients
For the Crust
- 1 cup Biscoff or Speculoos Cookie Crumbs Can substitute with graham cracker crumbs for a unique twist.
- 1/4 cup Melted Butter Coconut oil can be used for a dairy-free alternative.
For the Filling
- 8 oz Cream Cheese Ensure it's softened for easy mixing.
- 3/4 cup Powdered Sugar Feel free to reduce for a less sweet option.
- 1/2 cup Cookie Butter Plus extra for drizzling.
- 1 tsp Vanilla Extract Optional but recommended for added depth.
- 1 cup Heavy Whipping Cream Coconut cream works perfectly for a dairy-free version.
For the Garnish
- Extra Cookies Optional, adds a delightful crunch.
Instructions
Preparation Steps
- In a mixing bowl, combine Biscoff cookie crumbs with melted butter, stirring until the mixture resembles wet sand. Press this mixture into the base of 6 small dessert cups.
- In a large bowl, beat the softened cream cheese with powdered sugar, cookie butter, and vanilla extract until smooth and creamy.
- In a separate bowl, whisk the heavy whipping cream until stiff peaks form.
- Gently fold the whipped cream into the cream cheese mixture until combined and no streaks remain.
- Spoon the filling into the prepared crusts, smoothing out the tops.
- Cover the cups and refrigerate for at least 2 hours or overnight.
- Drizzle additional cookie butter on top and sprinkle crushed cookies for garnishing before serving.