
")

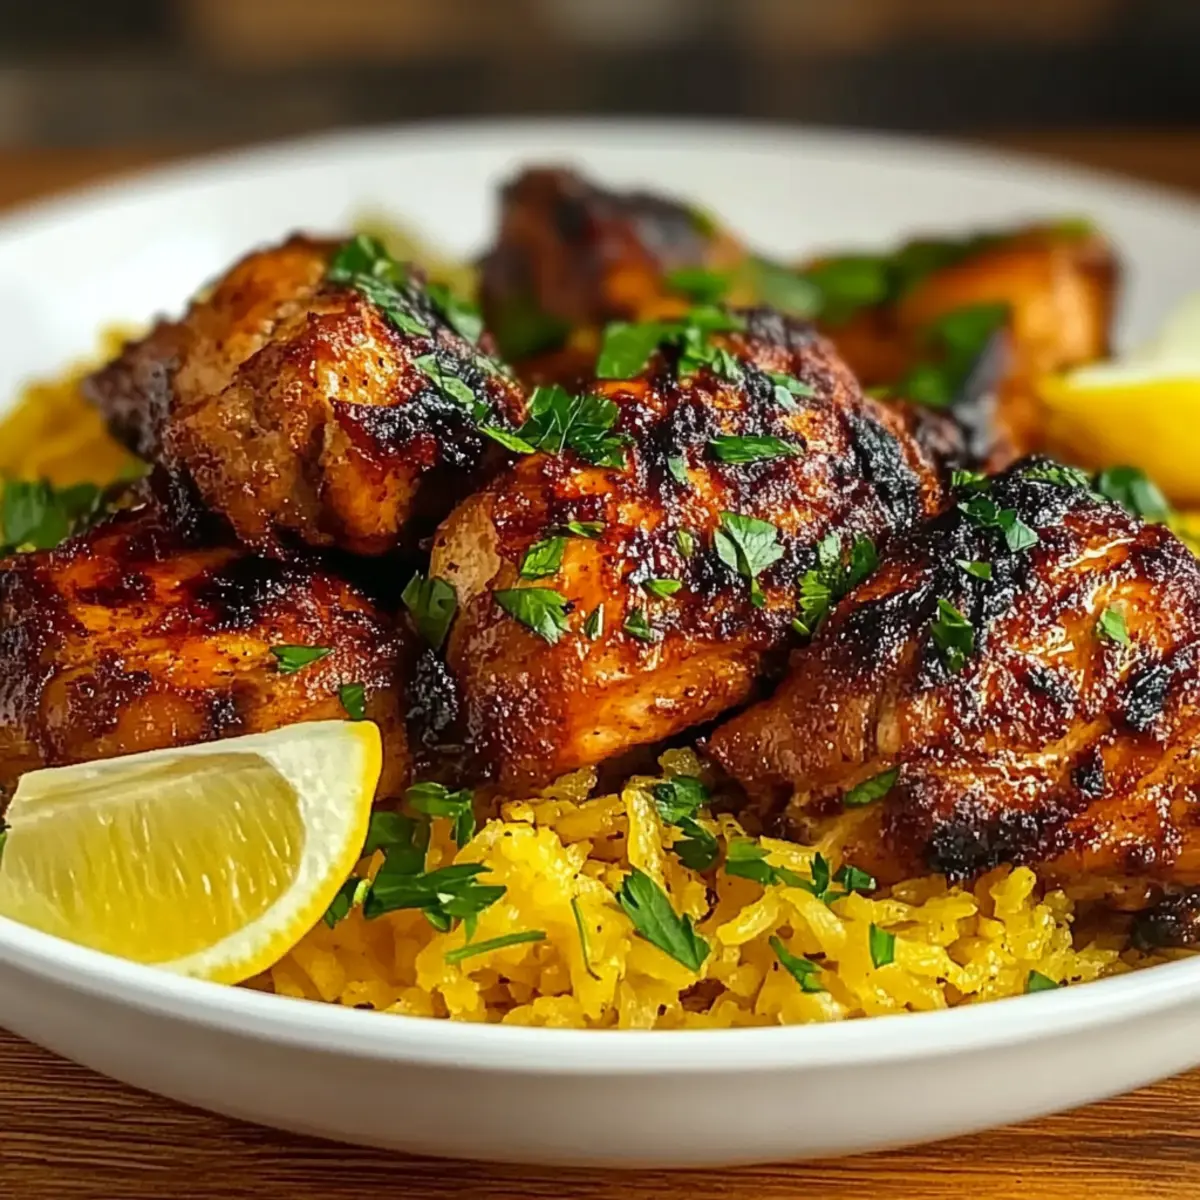
There I stood, fanning the air around me as spicy aromas danced from the grill, igniting memories of sun-soaked Portuguese summers. This Fiery Peri Peri Chicken has become my go-to recipe, bringing my loved ones together for unforgettable feasts. The blend of zesty lemon, robust garlic, and fiery chili flakes makes this dish not only an adventure for the taste buds but also a breeze to prepare. Whether you’re prepping for a vibrant backyard BBQ or simply craving a cozy dinner at home, this versatile recipe promises to impress your guests and satisfy those family members who are tired of takeout. So, are you ready to dive into this mouthwatering experience that transforms simple chicken into a flavor-packed masterpiece? Let’s get started!
Why is Peri Peri Chicken a Must-Try?
Irresistible Flavor: The harmony of lemon, garlic, and spices creates a mouthwatering taste that’s sure to impress even the pickiest eaters.
Quick and Easy: This recipe is perfect for busy weeknights; with minimal prep time and straightforward cooking, you can have a delicious meal on the table in no time.
Versatility: Whether you grill, roast, or even BBQ it, Peri Peri Chicken adapts effortlessly to your cooking style, making it a staple for any occasion.

Crowd-Pleaser: Serving this dish at your next gathering is guaranteed to leave your guests raving about its bold flavors.
Make-Ahead Friendly: Marinade your chicken ahead of time and store it in the fridge for a day or two; this will enhance the flavor and make mealtime even quicker!
Peri Peri Chicken Ingredients
For the Marinade
• Whole Chicken, cut into pieces – Main protein source providing richness; boneless pieces can speed up cooking.
• Olive Oil – Adds moisture and richness to help spices adhere; can substitute with vegetable oil for a lighter option.
• Garlic (4 cloves, minced) – Enhances the flavor profile; feel free to adjust according to your taste, or use garlic powder as a substitute if in a pinch.
• Lemons (2, juiced) – Provides acidity to balance the flavors; lime juice makes a refreshing alternative.
• Paprika (2 tablespoons) – Contributes beautiful color and smokiness; smoked paprika can intensify the flavor even further.
• Dried Oregano (1 tablespoon) – Adds an aromatic herbal note; thyme works well as a substitute if needed.
• Chili Flakes (1 tablespoon) – Delivers heat; adjust the amount based on your spice preference to achieve that perfect Peri Peri Chicken kick!
• Salt and Pepper (to taste) – Essential for enhancing all flavors in the dish.
Step‑by‑Step Instructions for Fiery Peri Peri Chicken
Step 1: Prep Marinade
In a mixing bowl, combine olive oil, minced garlic, lemon juice, paprika, dried oregano, chili flakes, salt, and pepper. Stir well until you achieve a smooth mixture. This flavorful marinade will be the heart of your Peri Peri Chicken, enhancing its taste with zesty and spicy notes.
Step 2: Marinate Chicken
Place the chicken pieces in a resealable bag and pour the marinade over them. Seal the bag tightly, ensuring the chicken is evenly coated with the marinade. For best results, refrigerate the chicken for at least 2 hours, allowing flavors to deeply penetrate, but overnight is ideal for maximum taste.

Step 3: Preheat Cooking Surface
Before you cook, preheat your grill or oven to medium-high heat, reaching approximately 375°F (190°C). This step is crucial for achieving that beautiful char and crispy skin on your Peri Peri Chicken. You’ll want the grill grates or baking tray ready to create those signature sear marks.
Step 4: Cook Chicken
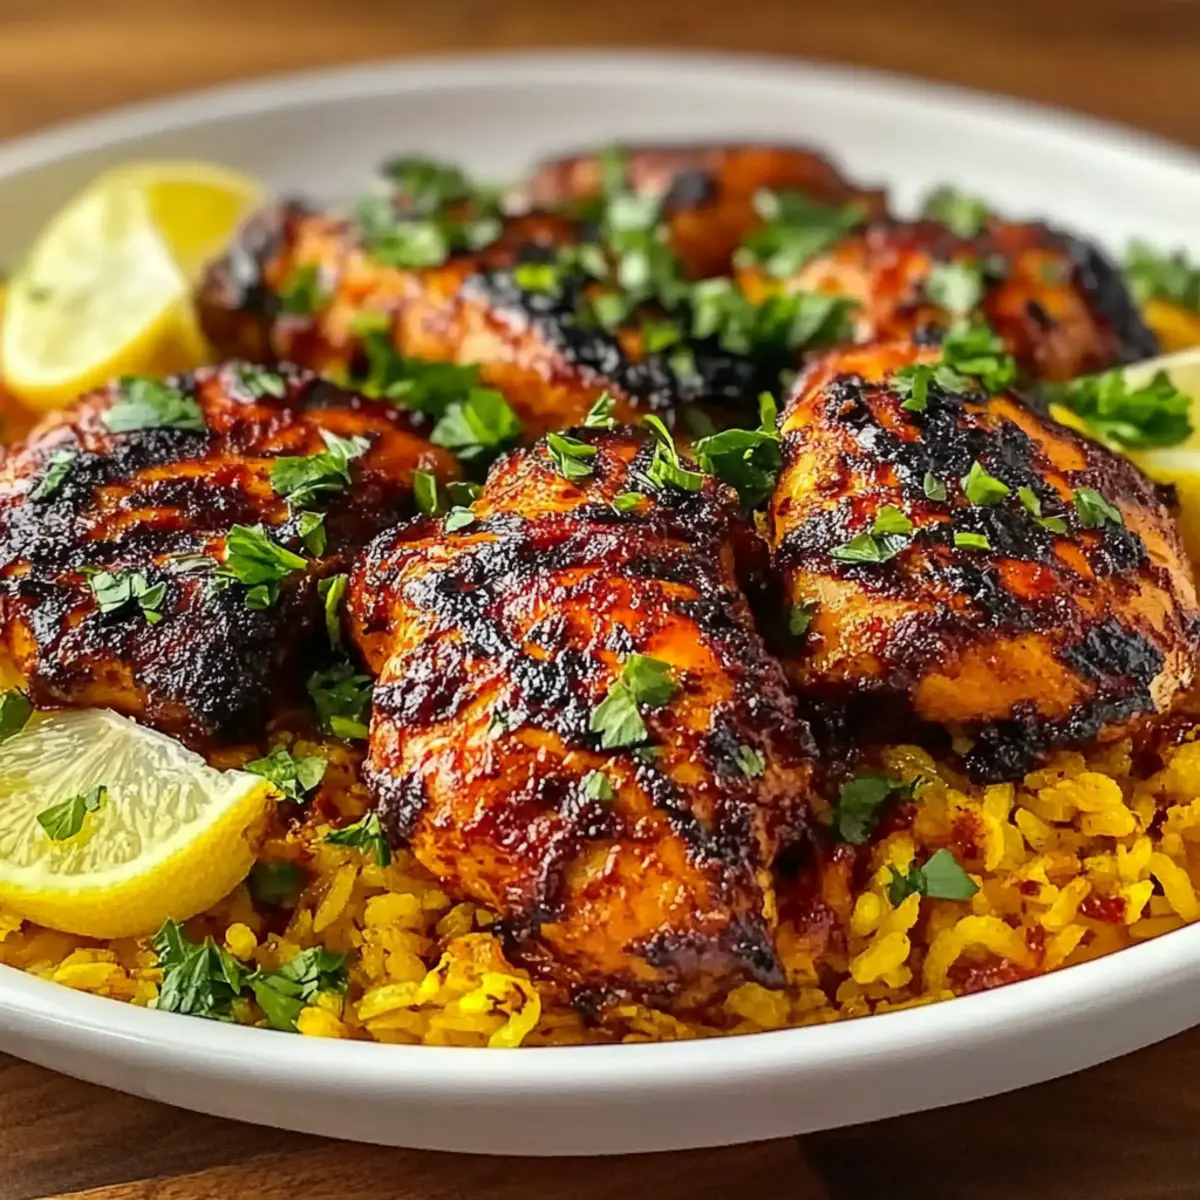
Once hot, arrange the marinated chicken pieces on the grill or in a baking dish. Cook for about 30 to 40 minutes, turning occasionally, until the chicken is golden brown and reaches an internal temperature of 165°F (74°C). Look for those enticing charred marks that signal it’s time to remove the chicken.
Step 5: Serve
Remove the chicken from the grill or oven and let it rest for a few minutes. This helps retain juices, ensuring every bite is succulent. Serve your Fiery Peri Peri Chicken hot, garnished with fresh herbs and lemon wedges, alongside your favorite sides like grilled vegetables or a vibrant salad.

Expert Tips for Fiery Peri Peri Chicken
-
Pierce for Flavor: Before marinating, gently pierce the chicken with a fork. This allows the marinade to deeply penetrate, ensuring maximum flavor absorption.
-
Baste While Cooking: To keep your Peri Peri Chicken moist, baste it with leftover marinade during cooking. This adds extra flavor and prevents drying out.
-
Rest Before Serving: Allow the chicken to rest for a few minutes after cooking. This helps the juices redistribute, making each bite exceptionally juicy.
-
Customize the Heat: Adjust the amount of chili flakes to suit your spice tolerance. Start small—you can always add more for that fiery Peri Peri Chicken kick!
-
Store Correctly: If you have leftovers, store them in an airtight container in the fridge for up to 3 days. Reheat gently for the best taste.
Make Ahead Options
Preparing your Peri Peri Chicken in advance is a fantastic way to save time and enhance flavors! You can marinate the chicken up to 24 hours ahead of time by following the marinade instructions and refrigerating it in an airtight container. This not only infuses the meat with delicious flavor but also makes your cooking process super quick on the day of serving. If you need even more flexibility, you can marinate the chicken for a couple of hours, then freeze it—simply thaw overnight in the refrigerator before grilling. When you are ready to cook, just preheat your grill or oven and follow the cooking instructions. With these make-ahead options, your Peri Peri Chicken will be just as juicy and bursting with flavor while making your busy weeknights a breeze!
Peri Peri Chicken Variations
Feel free to explore and modify this recipe to suit your taste buds and dietary needs!
- Vegetarian Option: Swap chicken for tofu or cauliflower florets; marinate and grill for a delightful plant-based dish full of flavor.
- Spice Levels: Adjust chili flakes to your comfort, or add fresh diced chilies for an extra punch; your taste, your rules!
- Lemon Zest Upgrade: Incorporate lemon zest along with the juice for a zesty burst of flavor that brightens every bite.
- Smoky Flavor: Use smoked paprika instead of regular paprika to deepen flavor and give it a BBQ-style twist; it’s like a hug from the grill.
- Herb Variations: Substitute oregano with fresh herbs such as basil or cilantro to add a botanical freshness and elevate the dish in a new direction.
- Nut-Free: For a nut-free version, ensure no nut oil is used; olive and vegetable oil are great alternatives.
- Creamy Addition: After cooking, drizzle some yogurt or a cashew cream sauce on top to enrich the flavors and add creaminess.
- Citrus Medley: Use a mix of lemon and lime juice for a more complex acidity that brightens the flavors even more—perfect for summer feasts!
Feel free to make these adjustments as you wish. If you’re seeking more inspiration, consider pairing it with grilled vegetables or a zesty salad for a heartier meal!
What to Serve with Fiery Peri Peri Chicken
Transform your Peri Peri Chicken into a delightful full meal by adding these delicious side options.
-
Creamy Coleslaw: This crunchy, tangy salad adds a refreshing contrast to the spicy chicken, enhancing every bite.
-
Grilled Corn on the Cob: Sweet and smoky, the charred kernels provide texture, balancing the heat with nature’s sweetness.
-
Roasted Vegetables: A medley of seasonal veggies roasted to perfection complements the zesty flavors, adding color and health to your plate.
-
Couscous Salad: Light, fluffy couscous mixed with herbs offers a fragrant base, soaking up juices and spices wonderfully.
-
Pita Bread with Hummus: Soft pita stuffed with creamy hummus makes for a convenient, satisfying side, perfect for scooping up those delicious flavors.
-
Zesty Lemon Rice: Flavored with fresh herbs and a hint of lemon, this side elevates your meal with a citrusy brightness, tying in the chicken’s marinade beautifully.
-
Sparkling Lemonade: A refreshing drink that cools down the spiciness, making every sip a delightful mix of sweet and tangy.
-
Chocolate Mousse: Finish on a sweet note! This rich, airy dessert contrasts the meal’s heat, providing a luxurious satisfying experience.
Storage Tips for Peri Peri Chicken
-
Fridge: Store leftover Peri Peri Chicken in an airtight container for up to 3 days to maintain freshness. Make sure it’s cooled to room temperature before sealing to avoid condensation.
-
Freezer: If you want to enjoy your Peri Peri Chicken later, freeze it in a freezer-safe container for up to 3 months. Thaw in the fridge overnight before reheating.
-
Reheating: For the best results, gently reheat your chicken in the oven at 350°F (175°C) until warmed through. This method keeps it juicy without drying it out.
-
Marinating Leftovers: If you have leftover marinade, do not reuse it unless it’s cooked down first for safety. Alternatively, make a new batch for future use, enhancing your next Peri Peri Chicken experience!

Peri Peri Chicken Recipe FAQs
How do I choose the right chicken for Peri Peri Chicken?
Selecting a whole chicken cut into pieces ensures juicy and flavorful results. Look for chicken with a fresh appearance, free from dark spots or unpleasant odors. If you prefer quicker cooking, boneless pieces like thighs or breasts work wonderfully as well!
What’s the best way to store leftover Peri Peri Chicken?
Absolutely! Store leftovers in an airtight container in the refrigerator for up to 3 days. Make sure your chicken is fully cooled before sealing to prevent condensation, which can affect its texture. For best flavor, gently reheat your chicken in the oven or on the grill to keep it juicy.
Can I freeze Peri Peri Chicken, and if so, how?
Yes, you can freeze Peri Peri Chicken with great results! Allow the cooked chicken to cool completely, then wrap it tightly in plastic wrap or place it in a freezer-safe container. It’s best enjoyed within 3 months. When ready to eat, thaw it overnight in the refrigerator before reheating gently in the oven at 350°F (175°C) to maintain juiciness.
What can I do if my chicken isn’t cooking evenly?
If you find that your chicken is cooking unevenly, it may be due to the cooking surface or the size of the chicken pieces. Consider using a meat thermometer to ensure that the internal temperature reaches 165°F (74°C) for safety and doneness. For optimal results, try rotating the chicken pieces halfway through cooking to promote even heat distribution.
Are there any dietary considerations for Peri Peri Chicken?
Certainly! While the base recipe is suitable for many eaters, it’s important to consider spice levels for sensitive palates or allergies, particularly with garlic, chili flakes, and oregano. If you or your guests have allergies, adjust the spices and always check ingredient labels. For a vegetarian variation, substitute chicken with tofu or cauliflower florets, adapting the marinade accordingly for equal flavor!
How long should I marinate the chicken for the best flavor?
For maximum flavor absorption, I recommend marinating the chicken for at least 2 hours, though overnight is ideal. This allows the spices and citrus from the marinade to permeate deeply into the meat, resulting in a more flavorful and tender Peri Peri Chicken.

Zesty Peri Peri Chicken: Your New Grilling Sensation
Equipment
- Grill
- mixing bowl
- Resealable Bag
- Baking Dish
Ingredients
For the Marinade
- 1 whole Chicken, cut into pieces Boneless pieces can speed up cooking.
- 1/4 cup Olive Oil Can substitute with vegetable oil for a lighter option.
- 4 cloves Garlic, minced Adjust according to your taste.
- 2 whole Lemons, juiced Lime juice makes a refreshing alternative.
- 2 tablespoons Paprika Smoked paprika can intensify the flavor.
- 1 tablespoon Dried Oregano Thyme works well as a substitute.
- 1 tablespoon Chili Flakes Adjust based on your spice preference.
- Salt and Pepper To taste.
Instructions
Step-by-Step Instructions
- In a mixing bowl, combine olive oil, minced garlic, lemon juice, paprika, dried oregano, chili flakes, salt, and pepper. Stir well until you achieve a smooth mixture.
- Place the chicken pieces in a resealable bag and pour the marinade over them. Seal the bag tightly, ensuring the chicken is evenly coated with the marinade.
- Refrigerate the chicken for at least 2 hours, allowing flavors to penetrate. Overnight is ideal.
- Preheat your grill or oven to medium-high heat, reaching approximately 375°F (190°C).
- Arrange the marinated chicken pieces on the grill or in a baking dish. Cook for about 30 to 40 minutes, turning occasionally, until golden brown and the internal temperature reaches 165°F (74°C).
- Remove the chicken and let it rest for a few minutes before serving.