
")

There’s something magical about a dessert that’s bite-sized, flavorful, and perfect for sharing. Strawberry cake balls are that dessert. Whether you’re preparing for a party, surprising a loved one, or just treating yourself, these delicious treats are sure to delight everyone.
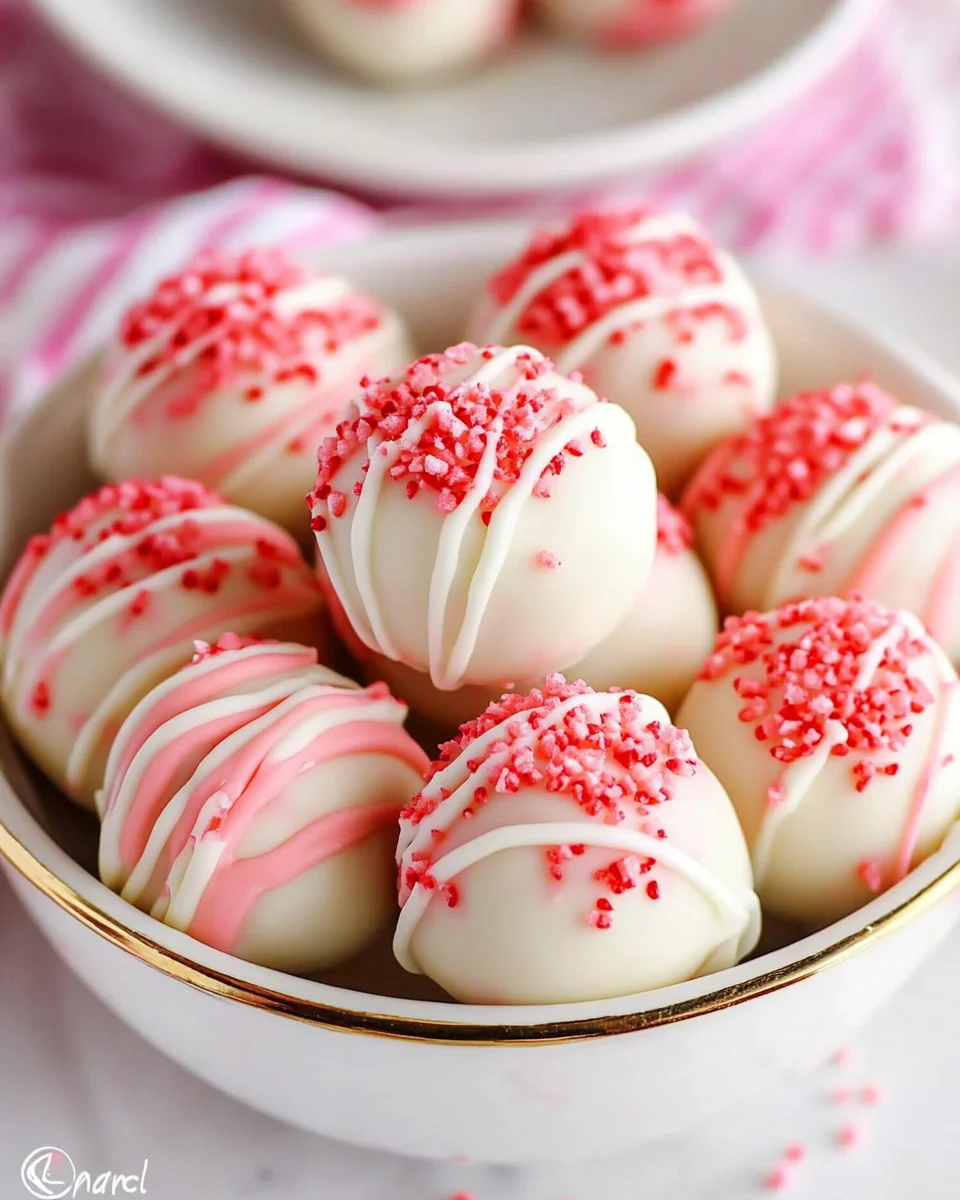
Imagine biting into a soft, creamy center bursting with strawberry flavor, coated in a luscious vanilla shell, and topped with sprinkles or drizzled with pink candy melts. Sounds irresistible, right? Don’t worry—you don’t need to be a professional baker to pull this off. With a few simple ingredients and easy steps, you’ll be creating your own strawberry cake balls in no time!
Why You’ll Love Strawberry Cake Balls
Strawberry cake balls aren’t just a treat; they’re an experience. Here’s why you’ll fall in love with them:
- No baking required (kind of): While you heat the cake mix briefly, there’s no need for an elaborate baking process.
- Customizable: From sprinkles to drizzles, you can make these cake balls your own.
- Perfect for any occasion: Birthdays, holidays, or just because—you can serve these treats anytime.
- Fun to make: It’s an enjoyable recipe that you can even make with kids!
Ready to get started? Let’s dive into the details.

Ingredients for Strawberry Cake Balls
Before you begin, gather the following ingredients to make your strawberry cake balls.
Main Ingredients
| Ingredient | Quantity | Notes |
|---|---|---|
| Strawberry cake mix | 15.25 ounces | I used Betty Crocker, but any brand works. |
| Cream cheese | 8 ounces (block) | Softened to room temperature. |
| Cream cheese chips | ⅓ cup | Roughly chopped for added flavor. |
| Vanilla melting wafers | 2 (10 oz) bags | Ghirardelli recommended for best results. |
| Pink candy melts (Wilton) | ½ cup | For drizzling (light and bright pink). |
| Sprinkles | Optional | Adds a festive finishing touch. |
Step-by-Step Instructions
1. Heat-Treat the Cake Mix
You might not realize it, but raw cake mix can contain bacteria. Don’t worry—heat-treating it is simple.
- Preheat your oven to 350°F (175°C).
- Spread the strawberry cake mix evenly on a parchment-lined baking sheet.
- Bake for 5 minutes, then allow it to cool completely on a wire rack.
This step ensures your cake mix is safe to use.
2. Prepare the Dough
- Place the softened cream cheese in a mixing bowl. Using a hand mixer on medium-high speed, beat until smooth and creamy.
- Gradually add the cooled cake mix to the cream cheese. Fold it in with a spatula first to avoid a flour mess.
- Finish mixing with the hand mixer on medium-high speed until you achieve a dough-like consistency.
3. Add the Cream Cheese Chips
- Gently fold the cream cheese chips into the dough until evenly distributed.
4. Chill the Dough
- Cover the bowl with plastic wrap and refrigerate the dough for 2 hours. This step helps the dough firm up, making it easier to shape.
5. Roll the Dough Balls
- Line two baking sheets with parchment paper.
- Use a 1 ½ tablespoon cookie scoop to portion out the dough. Roll each portion into smooth, even balls with your hands.
- Let the dough balls sit for 15 minutes to expand slightly. This prevents cracks in the coating later.
6. Melt the Vanilla Coating
You can melt the vanilla wafers in one of two ways:
Double Boiler Method
- Place the wafers in a heatproof bowl over a pot of simmering water.
- Stir constantly over low heat until fully melted.
Microwave Method
- Place the wafers in a microwave-safe bowl.
- Heat on low in 30-second intervals, stirring in between, until fully melted.
Pro Tip: The double boiler method keeps the coating at the perfect temperature for dipping.

7. Dip the Cake Balls
- Place one dough ball on a fork and dip it fully into the melted vanilla coating.
- Tap the fork gently on the bowl’s edge to remove any excess coating.
- Place the coated ball back on the parchment-lined baking sheet.
8. Decorate
- Before the coating dries, sprinkle some of the cake balls with your favorite sprinkles.
- Melt the two shades of pink candy melts in separate microwave-safe piping bags.
- Cut a small hole at the tip of each bag and drizzle the candy melts over the remaining cake balls.
9. Let Them Set
- Allow the cake balls to set completely at room temperature. Once the coating hardens, they’re ready to serve.
Nutritional Information
Here’s a general breakdown of the nutritional content per strawberry cake ball (yields approximately 24 balls):
| Nutrient | Amount |
|---|---|
| Calories | ~120 |
| Total Fat | 7g |
| Carbohydrates | 14g |
| Protein | 1g |
| Sugar | 10g |
Note: These values may vary slightly depending on specific brands and quantities used.
Tips for Perfect Strawberry Cake Balls
1. Use High-Quality Ingredients
High-quality cream cheese, melting wafers, and cake mix will elevate the flavor of your cake balls.
2. Avoid Overheating the Coating
If the vanilla coating gets too hot, it can become thick and hard to work with. Use low heat and stir often.
3. Work Quickly When Decorating
Sprinkles and drizzle should be added while the coating is still wet to ensure they stick.
4. Chill the Dough Properly
Don’t skip the refrigeration step! Chilled dough is easier to handle and results in smoother cake balls.
5. Experiment with Flavors
Feeling creative? Try swapping the strawberry cake mix for chocolate or lemon and adjust your decorations accordingly.
Serving Suggestions
Strawberry cake balls are incredibly versatile. Here are some ideas:
- Party Platters: Arrange them on a decorative tray for birthday parties or bridal showers.
- Holiday Gifts: Place them in gift boxes or wrap them in cellophane bags for a thoughtful homemade present.
- Everyday Treats: Store them in the fridge for an anytime indulgence!
Frequently Asked Questions
1. Can I use a different type of cake mix?
Absolutely! While this recipe uses strawberry cake mix, you can substitute it with other flavors like chocolate, vanilla, or red velvet.
2. How long do strawberry cake balls last?
Stored in an airtight container in the refrigerator, they’ll stay fresh for up to 5 days.
3. Can I freeze cake balls?
Yes! Freeze the undecorated cake balls for up to 2 months. Thaw them in the refrigerator before coating and decorating.
4. Do I have to use candy melts?
Candy melts are preferred for their smooth finish and ease of use, but you can substitute with white chocolate chips if needed.
5. What if my coating cracks?
Cracks usually happen if the dough balls are too cold or the coating is too hot. Let the dough balls sit at room temperature for a few minutes before dipping.
6. Can I make this recipe gluten-free?
Yes! Use a gluten-free cake mix to make this recipe suitable for gluten-sensitive individuals.
Final Thoughts: Time to Make Strawberry Cake Balls!
Now that you’ve got the recipe and all the tips, it’s time to roll up your sleeves and get started on your strawberry cake balls. These delightful, bite-sized desserts are as fun to make as they are to eat. Whether you’re preparing for a special event or just satisfying your sweet tooth, this recipe is guaranteed to impress.
So what are you waiting for? Gather your ingredients, follow the steps, and enjoy the process of creating these beautiful and delicious treats. Happy baking!